

The following guide will go through the steps involved in setting up Lambda functions to start/stop EC2 instances and creating Cloudwatch rules to automate the process of starting or stopping of EC2 instances at a specific time period.
The whole process is broken into 3 parts and they are listed below.
- Setting up IAM roles for Lambda functions.
- Creating Lambda functions in Python.
- Creating a CloudWatch Rule to trigger the Lambda functions.
Setting up IAM roles for Lambda functions.
The IAM role to be configured can be applied to all the instances or restricted to a particular instance. The steps mentioned here are for setting up IAM roles which applies to a specific instance, to do that the ARN or Amazon Resource Name of that particular instance needs to be mentioned in IAM policy. The syntax of the ARN is given below, please refer to the link given below to find more details about it.
https://docs.aws.amazon.com/general/latest/gr/aws-arns-and-namespaces.html
arn:partition:service:region:account-id:resource-id
arn:partition:service:region:account-id:resource-type/resource-id
arn:partition:service:region:account-id:resource-type:resource-id
The account-id, instance-id needs to be obtained to create the ARN for that particular instance. A sample is given below, for an instance with id i-12345678 in an account with Account ID 9876-5432-1098 will be like the one given below.
arn:aws:ec2:*:987654321098:instance/i-12345678
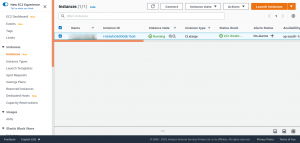
The instance ID can be obtained from the EC2 Management Console and the Account ID will be available from the Billing dashboard.
Once the instance ID and account ID is obtained ARN for the corresponding instance can be written and can proceed to create IAM policy and role for the Lambda functions.
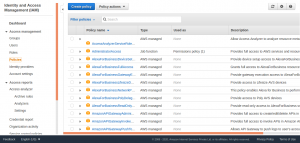
From the Identity and Access Management Panel, select Create policy.
Select JSON to enter the policy in JSON format.
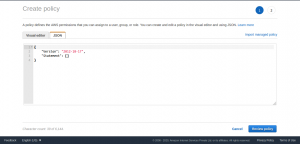
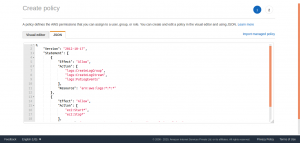
The IAM policy to be entered is given below.
{
"Version": "2012-10-17",
"Statement": [
{
"Effect": "Allow",
"Action": [
"logs:CreateLogGroup",
"logs:CreateLogStream",
"logs:PutLogEvents"
],
"Resource": "arn:aws:logs:*:*:*"
},
{
"Effect": "Allow",
"Action": [
"ec2:Start*",
"ec2:Stop*"
],
"Resource": "arn:aws:ec2:*:<account_id>:instance/<instance_id>"
}
]
}
Change the <account_id> and <instance_id> with corresponding values.
And in order to have an IAM policy which applies to all the instance in the account, modify the policy code as below.
{
"Effect": "Allow",
"Action": [
"ec2:Start*",
"ec2:Stop*"
],
"Resource": "*"
}
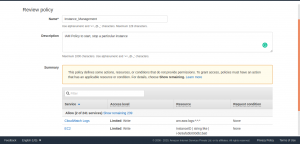
The policy is added in JSON format and select Review policy to continue.
Add a name to the policy and description and select Create policy.
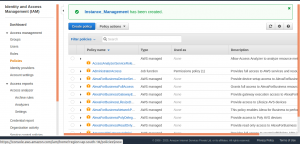
Now the IAM Policy is created, proceed to create a Role, and attaching this policy to the IAM role.
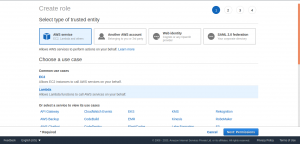
Select Roles from the left side menu to continue with creating IAM Role. Select Create role and select Lambda as a use case for this role.
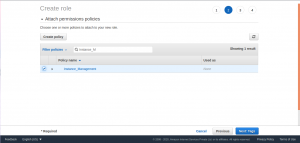
Select Permissions to continue and attach the policy has been created earlier to this IAM role.
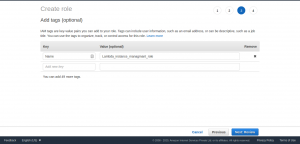
Attach a tag to the role for identification purposes (optional).
Select Review to continue.
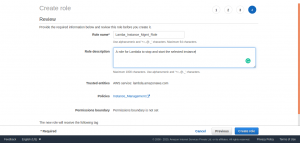
Select `Create role` and the IAM role is created.
Now the required IAM policy and role is created, proceed to create Lambda functions.
Creating Lambda functions.
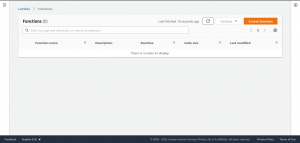
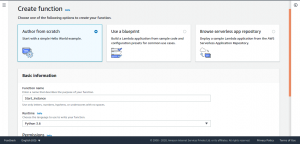
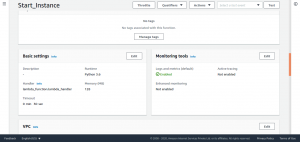
From the AWS Lambda console create two functions to start and stop the instance. Select Create function to proceed.
Choose Author from scratch. Enter a function name and choose Python 3.6 as runtime.
Here a function for starting the instance is created, a corresponding function name is entered describing the purpose of this function.
Under Permissions, expand Choose or create an execution role. From Execution role, choose Use an existing role and under Existing role, choose the IAM role which has been created earlier.
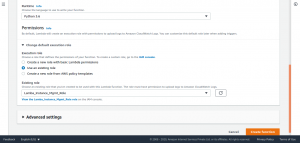
Select Create function to continue.
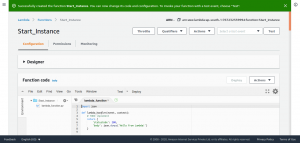
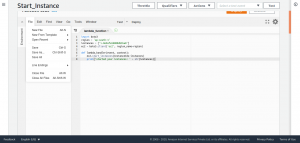
Enter the following code to the Lambda function to start the instance.
import boto3
region = '<Region>'
instances = ['<Instance-ID>']
ec2 = boto3.client('ec2', region_name=region)

def lambda_handler(event, context):
ec2.start_instances(InstanceIds=instances)
print('started your instances: ' + str(instances))
Replace <Region> and <Instance-ID> to corresponding values.
Scroll down the page to tweak the timeout value. Select Edit and enter a suitable value, leave the rest of the values to default. The default timeout value will be 3 sec.
After doing this save the function.
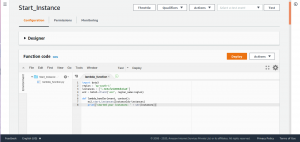
Now proceed to create a second function to stop the instance.
Repeat all the steps mentioned above once again and replace the function code with the one given below. Also, make sure to change the function name to a suitable one.
import boto3
region = '<Region>'
instances = ['<Instance-ID>']
ec2 = boto3.client('ec2', region_name=region)

def lambda_handler(event, context):
ec2.stop_instances(InstanceIds=instances)
print('stopped your instances: ' + str(instances))
Replace <Region> and <Instance-ID> to corresponding values.
Now Lambda function for starting and stopping the instance is created, proceed to create CloudWatch rule to trigger these Lambda functions.
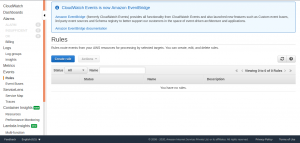
Creating a CloudWatch Rule to trigger the Lambda functions.
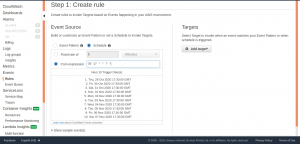
Access the CloudWatch dashboard and from the left navigation pane, under Events, choose Rules.

Select Create rule.
Under Event Source, choose Schedule.
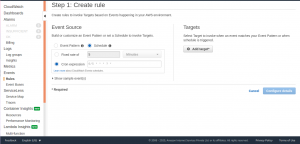
Choose Cron expression. Please note that all scheduled events use the UTC time zone, so convert the time period to UTC format and set the cron accordingly.
Select Targets and choose Lambda from the list.
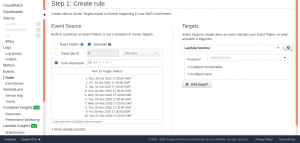
Select the required Lambda function from one of the two functions created earlier. This CloudWatch rule will stop the instance at specificied time.
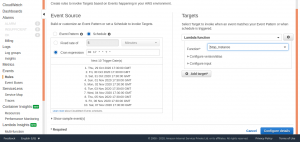
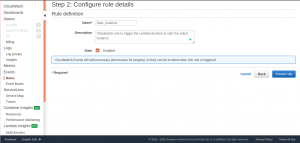
Select Configure details to continue.
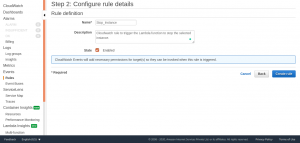
Select Create rule and the CloudWatch rule for stoping instance is created. Set up another CloudWatch rule for starting the instance by repeating the steps performed earlier, only changes will be the time period of cron and the Lambda function.

Select Create rule and the CloudWatch rule for stating the instance is created.
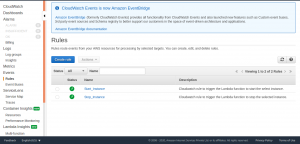
The CloudWatch will trigger these rules thereby invoking the Lambda function automating the start and stop of EC2 instance at a specific time period defined in CloudWatch event rule.


