

Here we will look at how an instance can be created in Amazon Web Service or AWS. For doing this we will use a free tier account or you can use your AWS account too.
Log in to the AWS console. You can use the link https://console.aws.amazon.com to access the console. You will log in to AWS Dashboard or AWS Management Console.
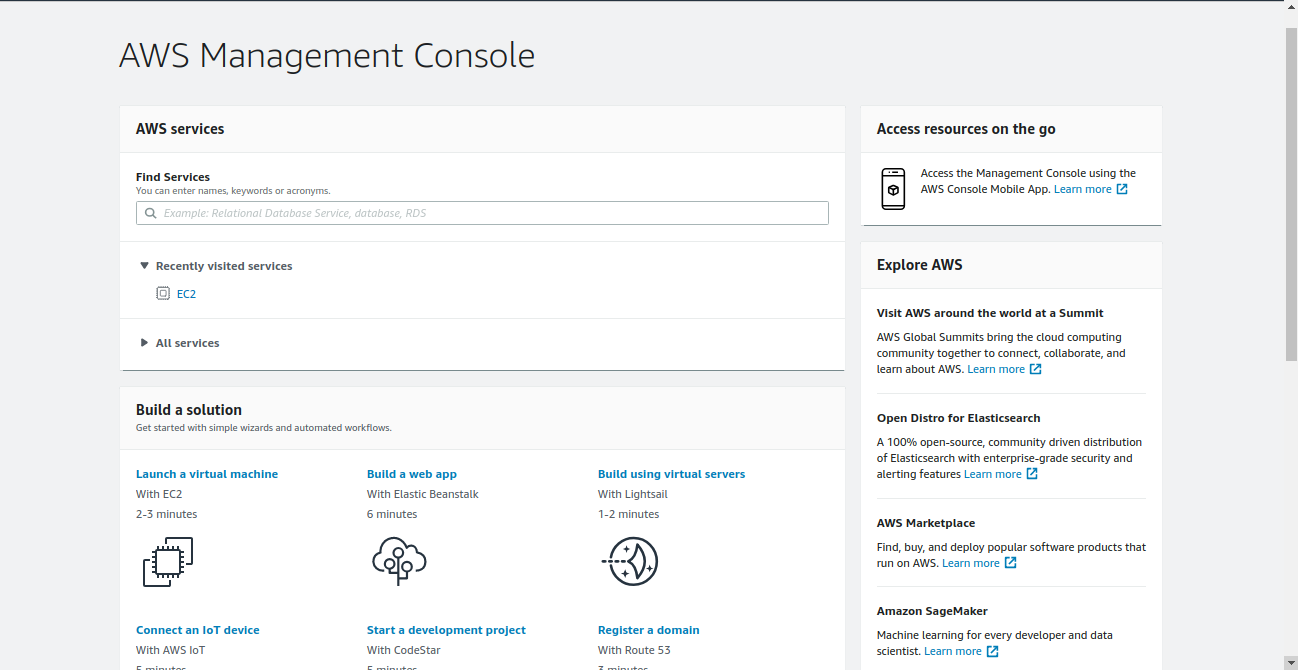
In order to create an instance, the EC2 dashboard needs to be accessed. For doing that, search for EC2 in the empty field provided under “Find Services” in the AWS Management console. EC2 Dashboard/Management console can be accessed by selecting “Launch a virtual machine” from the AWS management console.
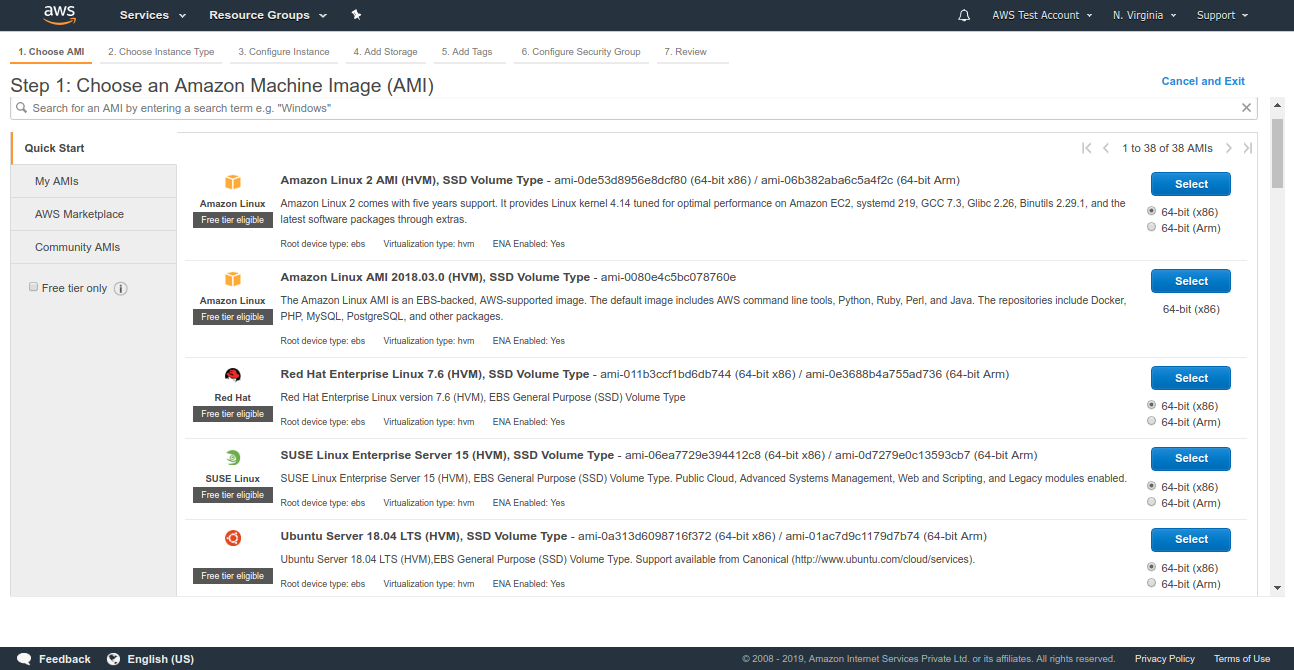
For creating the instance it is required to select an AMI or Amazon Machine Image. Several such machine images are available for creating an instance, some of these images are free to use while others are not. For this instance, we will select RHEL7 as its base image.
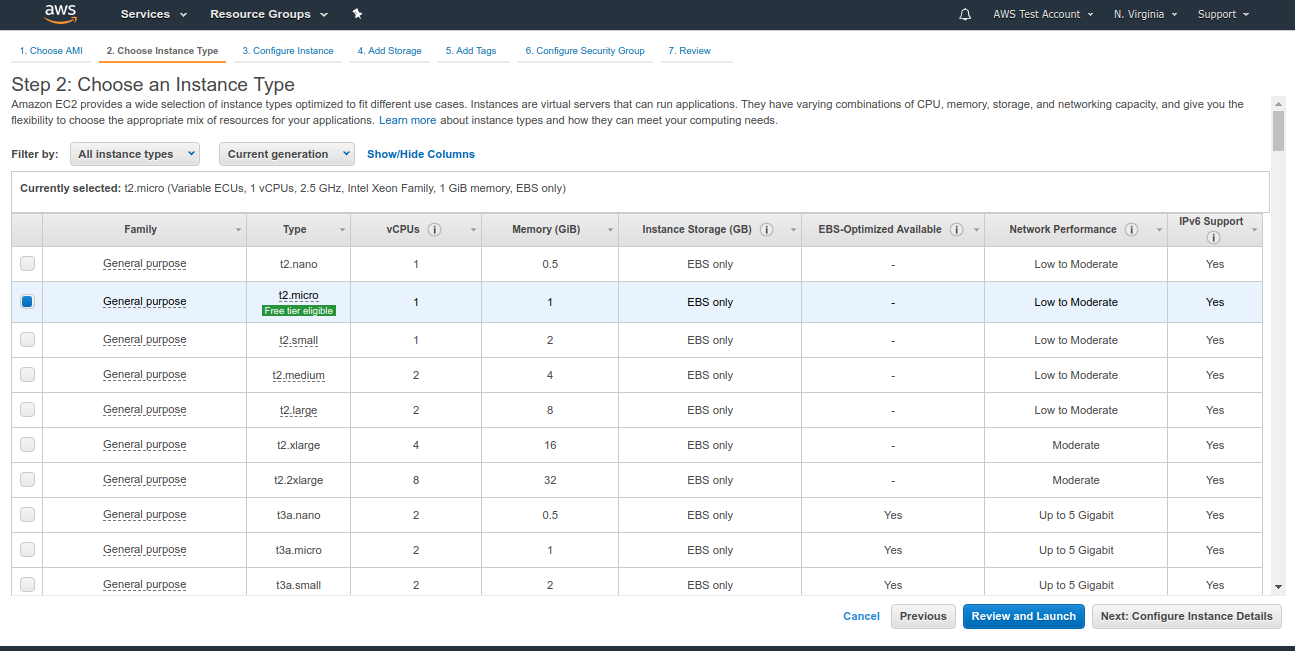
Once the required AMI, for instance, is selected, we will need to specify the instance type. Each instance type is optimized for certain use cases and requirements. Select the required type from the available list of options ranging from basic instances like t1.nano to specialized instances like storage optimized, accelerated computing, etc. For this instance, we will select the type “t2.micro” which offers 1GB RAM and a single-core CPU. Once the instance type is selected, the next step is to configure the instance details.
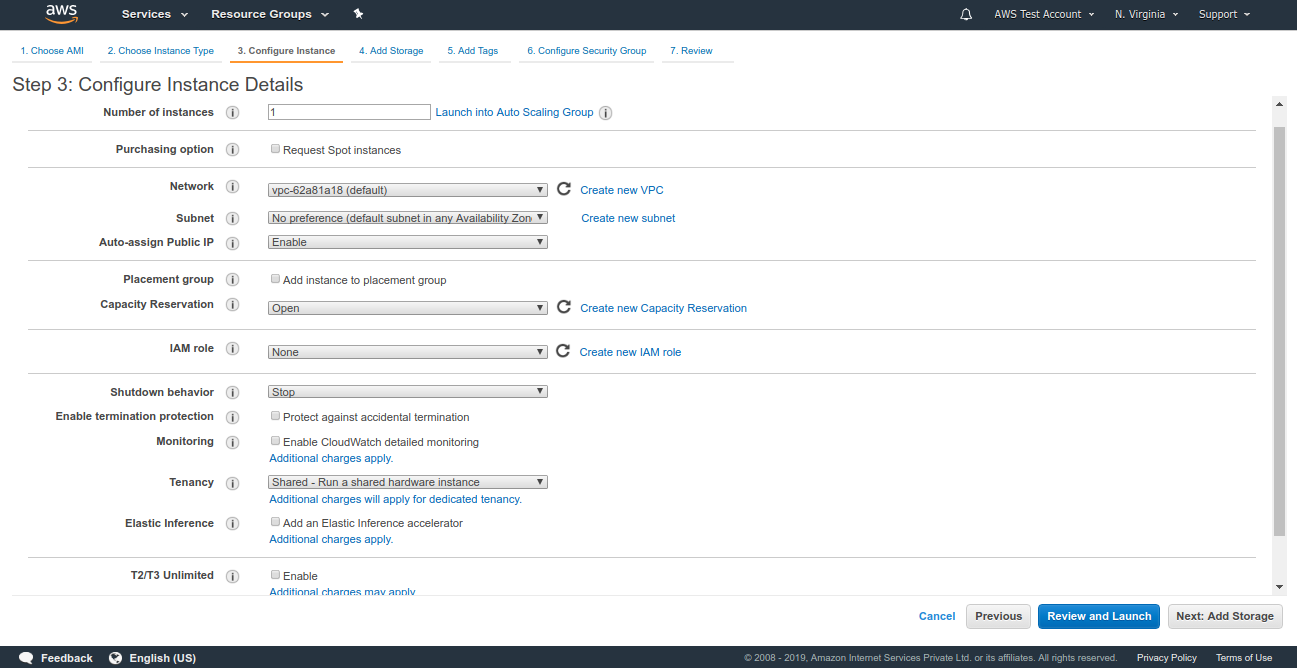
In “Configure Instance Details” page, we are required to enter the following details like the number of instances, required Virtual Private Cloud, select its subnetting and it also has the option to attach an Elastic IP, IAM role, etc. Here, we go with default values except enabling the auto-assign of Public IP. Select “Add Storage” from the extreme bottom right of the page to go to the next page.
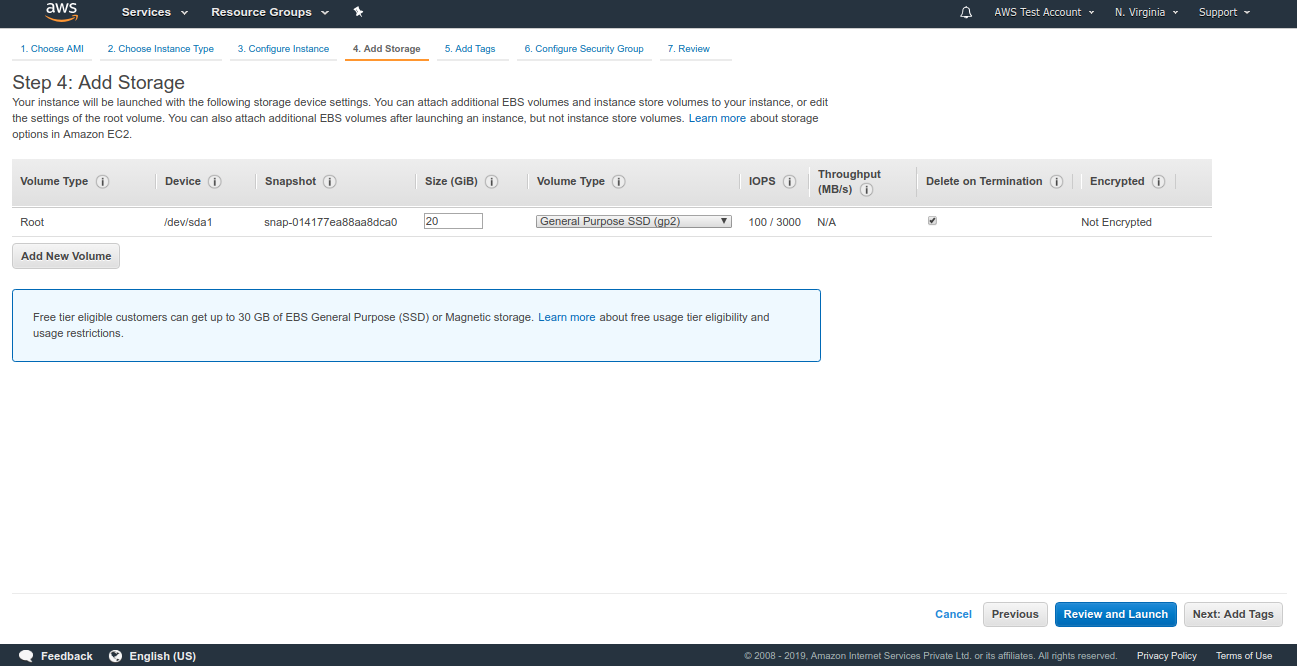
In the “Add Storage” page, we can specify the amount of storage allocated to this instance, select the type of volume and also provide the option to add a new volume to the instance in this interface itself. We will allocate 20 GB of space to this instance while sticking to the default values. After doing this select “Add Tags” from the extreme bottom right of the page to go to the next page.
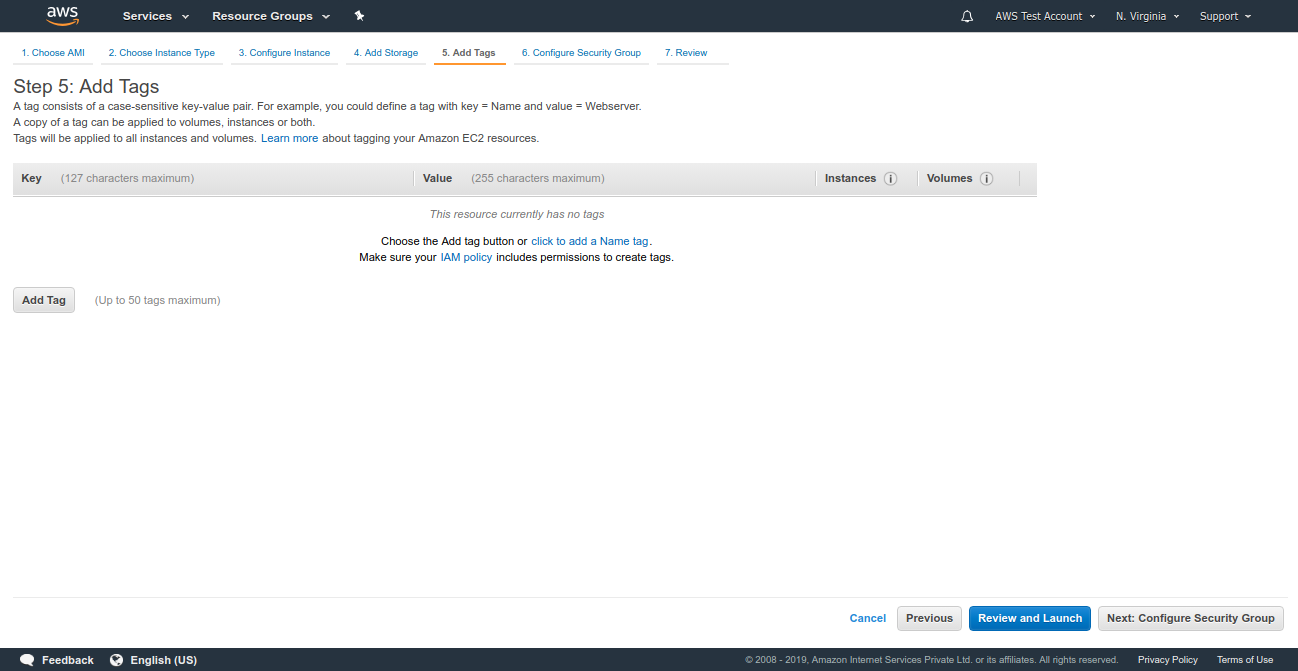
This adding tags to the instance are optional, in this page, we can add tags to the instance. It is not mandatory to add tags to the instance. We will skip this step and move to the next page. Select “Configure Security Group” from the extreme bottom right of the page to proceed.
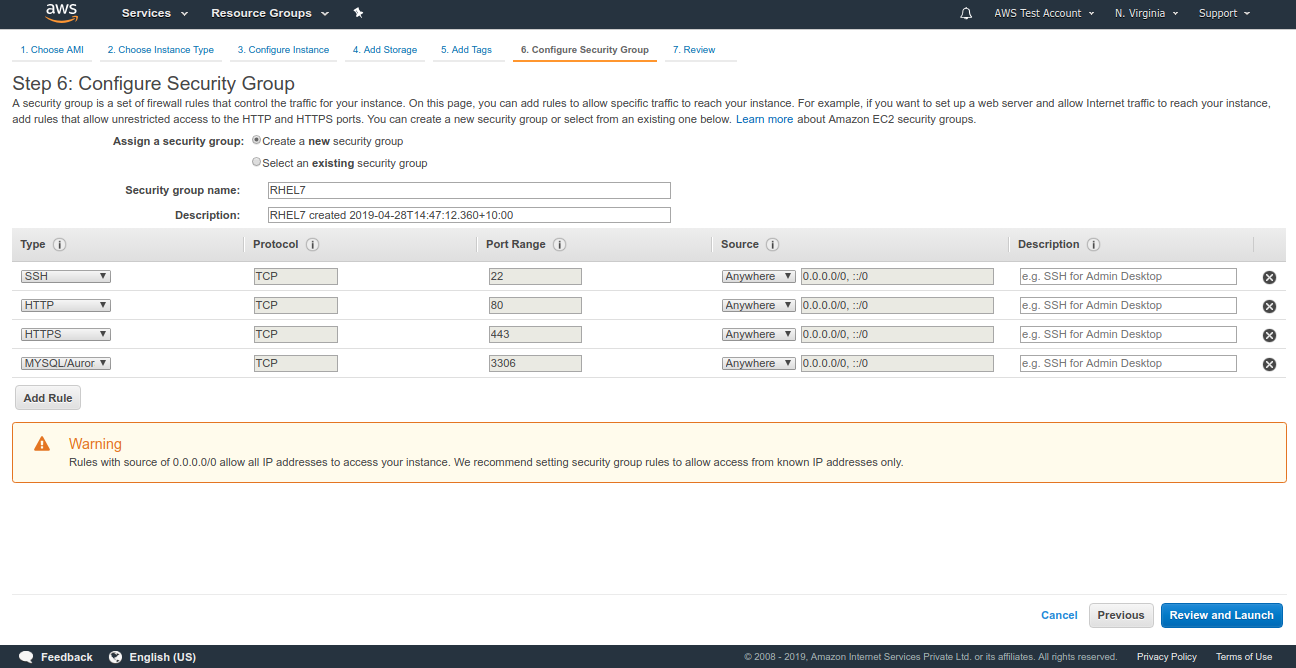
The security group needs to be defined for the instance. A security group is a set of firewall rules that control the traffic for your instance. Here we can create a new security group for the instance or add the instance to the existing security group. We can also customize the security policy for each service running in the instance. For example, a security group can be created in a way that the connection to HTTP service is open to any IP, while SSH is restricted to your IP or certain IP and connections to MySQL are not allowed from any IP.
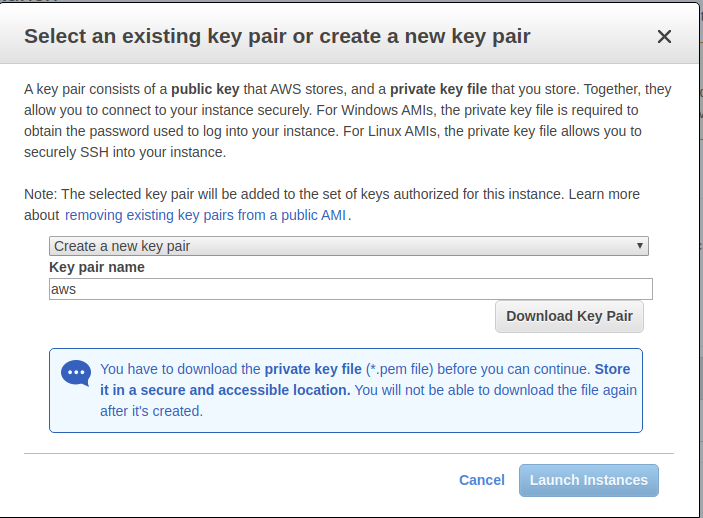
From the Review and Launch page, we can view the changes that have been made in the previous steps and create a key pair that is required to log in to the server. From the drop-down menu, select Create a new key pair to create a new key file or add the existing key file to this instance. Enter a name for the pem file and select Download Key Pair as this is required to login to the server.
Once the pem file is downloaded to the server, select “Launch Instances”.

Select “Launch” to confirm the changes and launch the instance. We will need to create a key pair to log in to the instance and launch the instance. A confirmation page will be shown once the instance is initialized.

Select “View Instances” from the extreme bottom right of the page to view the available instance.

AWS instance setup with RHEL7 is completed.
Connecting to the instance
In order to connect to the instance, we need to change the permission of the key file to “400” ie user has read permission while group and others have no access to the key file. We can do that by executing the command.
chmod 400 <key.pem>
Here the name of the pem file we have created is RHEL7.pem so the command will look like this.
chmod 400 RHEL7.pem
To connect to the instance we need to know the public DNS which will look like “ec2-xx-xxx-xx-xxx.compute-x.amazonaws.com” or public IP of the instance. This can be obtained from the instance description in AWS EC2 console.
To SSH into the instance execute the following command.
ssh [email protected] -i /path/to/keyfile
or
ssh ec2-user@publicIP -i /path/to/keyfile
Enabling Password-based Authentication
It is more convenient but less secure to use a password rather than using a key file. Password-based authentication can be enabled by executing the following steps. Login to the instance and switch to root by using the following command.
sudo su
Now set the password for the user root and ec2-user by executing the following command.
passwd <username>for eg: passwd ec2 – user
Once the password is changed for both users, we can continue to the next steps. Now edit the sshd_config file using a text editor.
vi /etc/ssh/sshd_config
Locate the following line and change it as follows.
#PermitRootLogin yes ======> PermitRootLogin yes (In order to enable root login).
PasswordAuthentication no ======> PasswordAuthentication yes (To permit password based login).
Save the changes and exit. Restart the SSH service using the command.
service sshd restart (or) systemctl restart sshd
Password-based login is now enabled in the server.


