




Configuring your Instance
This series will help you create a WordPress website on AWS. This first part will help you configure your EC2 instance by installing LAMP (Linux Apache MySQL PHP) on it. We will move on to set virtual host on the instance to use multiple domains if needed. In the third part, we will be installing phpMyAdmin and will follow some steps to secure it. We will install WordPress on the server in the fourth part followed by configuring the WordPress site contents to be loaded from AWS CDN using S3 bucket and CloudFront.
The first and foundational step is to create a new instance followed by installing and configuring the required software. Creating an instance in AWS is simple and you can follow their documentation if you are not familiar.
https://docs.aws.amazon.com/efs/latest/ug/gs-step-one-create-ec2-resources.html
CentOS is considered to be a more stable distribution mainly because package updates are less frequent compared to Ubuntu. Control Panels like cPanel offered to web hosting is mainly focused on CentOS and RHEL. On the other hand, Ubuntu has more support and solution can be found easily. If you are a beginner, you can go for Ubuntu. Here, we will be choosing the CentOS AMI (Amazon Machine Image).
Installing Apache
Apache is the most common and popular web server, which makes it a great choice for hosting a website. SSH into your server by the key you have made. Switch to root and make the package list up to date and then install Apache.
$ ssh -i Downloads/a_xx1.pem [email protected] $ sudo -i # yum update -y # yum install httpd -y
Once installed, you can start Apache and make it start on boot. You can verify everything is okay by calling the IP address in the browser (http://xxx.xxx.xxx.xxx) and the default Apache web page. Here, we will be denoting the IP address as xxx.xxx.xxx.xxx.
# systemctl start httpd.service # systemctl enable httpd.service
Installing MySQL
Next, we will be installing MariaDB, a drop-in replacement for MySQL. After the installation is complete, we will need to start and enable MariaDB.
# yum install mariadb-server mariadb -y # systemctl start mariadb # systemctl enable mariadb
After installation, we will need to run a security script that will remove some dangerous defaults and lock down access to our database system.
# mysql_secure_installation
You will be asked current root password. Leave it blank by pressing enter and set a new root password in the next prompt. Go ahead and enter Y and follow the instructions. You will be removing some sample users and databases, disabling remote root logins, and load these new rules so that MySQL immediately respects the changes we have made.
# mysql_secure_installation NOTE: RUNNING ALL PARTS OF THIS SCRIPT IS RECOMMENDED FOR ALL MariaDB SERVERS IN PRODUCTION USE! PLEASE READ EACH STEP CAREFULLY! In order to log into MariaDB to secure it, we'll need the current password for the root user. If you've just installed MariaDB, and you haven't set the root password yet, the password will be blank, so you should just press enter here. Enter current password for root (enter for none): OK, successfully used password, moving on... Setting the root password ensures that nobody can log into the MariaDB root user without the proper authorisation. Set root password? [Y/n] y New password: Re-enter new password: Password updated successfully! Reloading privilege tables.. ... Success! By default, a MariaDB installation has an anonymous user, allowing anyone to log into MariaDB without having to have a user account created for them. This is intended only for testing, and to make the installation go a bit smoother. You should remove them before moving into a production environment. Remove anonymous users? [Y/n] y ... Success! Normally, root should only be allowed to connect from 'localhost'. This ensures that someone cannot guess at the root password from the network. Disallow root login remotely? [Y/n] y ... Success! By default, MariaDB comes with a database named 'test' that anyone can access. This is also intended only for testing, and should be removed before moving into a production environment. Remove test database and access to it? [Y/n] y - Dropping test database... ... Success! - Removing privileges on test database... ... Success! Reloading the privilege tables will ensure that all changes made so far will take effect immediately. Reload privilege tables now? [Y/n] y ... Success! Cleaning up... All done! If you've completed all of the above steps, your MariaDB installation should now be secure. Thanks for using MariaDB!
Installing PHP
PHP will be processing the code to display dynamic content. It can connect to the database and get needed data. We will be installing PHP 7.2 here.
PHP 7.x packages are available in several different repositories. We will be using the Remi repository which provides newer versions of various software packages including PHP. The Remi repository depends on the EPEL repository, and we need to install the EPEL repository first.
# yum install epel-release -y # yum install http://rpms.remirepo.net/enterprise/remi-release-7.rpm -y
Start by enabling the PHP 7.2 Remi repository and move on to install some common PHP modules.
# yum-config-manager --enable remi-php72 # yum install php php-common php-opcache php-mcrypt php-cli php-gd php-curl php-mysqlnd -y # php -v PHP 7.2.15 (cli) (built: Feb 5 2019 19:50:47) ( NTS ) Copyright (c) 1997-2018 The PHP GroupZend Engine v3.2.0, Copyright (c) 1998-2018 Zend Technologies with Zend OPcache v7.2.15, Copyright (c) 1999-2018, by Zend Technologies
After restarting Apache, you can test PHP by creating a new info page, Inf.php with the below content and accessing it via the browser (http://xxx.xxx.xxx.xxx/Inf.php).
# systemctl restart httpd.service # vi /var/www/html/Inf.php
Note:
For quick setup, run the below command. However, you will be prompted during the MySQL script running.
yum update -y && yum install httpd mariadb-server mariadb -y && systemctl start httpd.service && systemctl enable httpd.service && systemctl start mariadb && systemctl enable mariadb && yum install epel-release -y && yum install http://rpms.remirepo.net/enterprise/remi-release-7.rpm -y && yum-config-manager --enable remi-php72 && yum install php php-common php-opcache php-mcrypt php-cli php-gd php-curl php-mysqlnd -y && systemctl restart httpd.service && mysql_secure_installation
You have now installed the LAMP stack. This will allow you to install most kinds of websites and web software on your server.
SETTING UP VIRTUAL HOSTS
Virtual Hosts are used when we have more than one domain to run with a single IP address. We can have multiple websites on our server and there is no limit to the number of virtual hosts that can be added.
For setting up virtual hosts on CentOS 7, follow the below steps. It is assumed that you have installed LAMP by following the Part One.
Create a new user and then create a directory for the website with the ownership as the new user.
# mkdir -p /var/www/site1/public_html # chown -R site1: /var/www/site1
Now, create a test page for later checking.
# vi /var/www/site1/public_html/index.html <html> <head> <title>site1.com</title> </head> <body> <h1>Success: You Have Set Up your first Virtual Host</h1> </body> </html>
For turning on the virtual host, enter the below contents to the Apache configuration.
# vi /etc/httpd/conf/httpd.conf <VirtualHost *:80> ServerAdmin [email protected] DocumentRoot /var/www/site1/public_html ServerName www.site1.com ServerAlias site1.com ErrorLog /var/www/site1/error.log </VirtualHost>
These are the most important lines. The star (*) means any one of the server IP. You can enter your server dedicated IP instead. Document Root is the path where the website files are kept. Server name and Alias are the domain name we would be calling. Error log is to track errors.
Restart Apache and check if any error occurs from
/var/log/httpd/error_log. # service httpd restart
If you find any error that the document root or files inside have permission issues, do the following. This will manage the SELinux policies.
# semanage fcontext -a -t httpd_log_t "/var/www/site1(/.*)?" # restorecon -Rv /var/www/site1 restorecon reset /var/www/site1 context unconfined_u:object_r:httpd_sys_content_t:s0->unconfined_u:object_r:httpd_log_t:s0 restorecon reset /var/www/site1/public_html context unconfined_u:object_r:httpd_sys_content_t:s0->unconfined_u:object_r:httpd_log_t:s0 restorecon reset /var/www/site1/public_html/index.html context unconfined_u:object_r:httpd_sys_content_t:s0->unconfined_u:object_r:httpd_log_t:s0 restorecon reset /var/www/site1/error.log context unconfined_u:object_r:httpd_sys_content_t:s0->unconfined_u:object_r:httpd_log_t:s0 # ls -lZ /var/www/site1/ -rw-r-xr-x. site1 site1 unconfined_u:object_r:httpd_log_t:s0 error.log drwxr-xr-x. site1 site1 unconfined_u:object_r:httpd_log_t:s0 public_html
And finally reset the file permissions.
# cd /var/www/site1/ # find . -type d -exec chmod 755 {} \; # find . -type f -exec chmod 644 {} \;
Check the site by calling the domain in browser. If you are testing the site before changing the DNS records, you can do this by adding an host entry on your system.
<IP address> site1.com www.site1.com
In Linux, add the above entry in /etc/hosts after opening it with root privilege.
In Windows, open c:\Windows\System32\Drivers\etc\hosts in a notepad with administrator privilege. You can follow these steps to add multiple virtual hosts. That’s it, you will see the test page loaded in the browser.
INSTALLING AND SECURING PHPMYADMIN
A website may require database connection and management. Here we will install phpMyAdmin, a common database management tool. Then we will follow some steps to secure it and using this tool, create a database and a user.
To setup the server, you will need to follow the Part One of this series.
Install phpMyAdmin using the below command and restart Apache.
# yum install phpMyAdmin -y # systemctl restart httpd.service
You can access the interface from the browser. But you will be getting a 403 permission error. In that case, open the configuration file /etc/httpd/conf.d/phpMyAdmin.conf and edit some lines. If you want to access phpMyAdmin from anywhere, add Require all granted between the lines as below or you can add Require ip xxx.xxx.xxx.xxx for a specific IP.
<IfModule mod_authz_core.c> # Apache 2.4 <RequireAny> Require ip 127.0.0.1 Require ip xxx.xxx.xxx.xxx Require ip ::1 Require all granted </RequireAny> </IfModule> 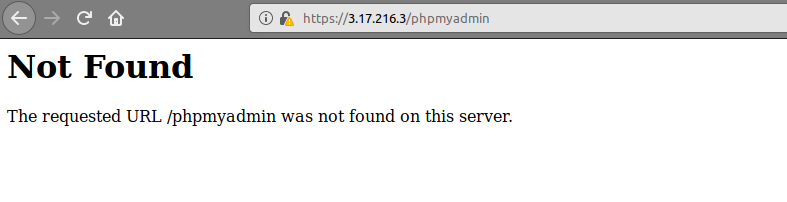
We can secure the installation by following some methods. We can change the URL with which the interface is accessed. Open the configuration file and make change as below. Feel free to change MyAdmin to anything you like. Make sure you restart Apache after you make change to the configuration file.
# vi /etc/httpd/conf.d/phpMyAdmin.conf #Alias /phpMyAdmin /usr/share/phpMyAdmin #Alias /phpmyadmin /usr/share/phpMyAdmin Alias /MyAdmin /usr/share/phpMyAdmin # systemctl restart httpd.service
Now you will need to call http://xxx.xxx.xxx.xxx/MyAdmin instead of http://xxx.xxx.xxx.xxx/phpMyAdmin to get the interface.
We will setup an authentication prompt that a user would be required to pass before going to the phpMyAdmin login screen. For that, we will need to override the admin configurations by adding the line AllowOverride All as below allowing us to specify additional configuration details in a file .htaccess located in phpMyAdmin directory. We will use this file to set up our password authentication.
# vi /etc/httpd/conf.d/phpMyAdmin.conf <Directory /usr/share/phpMyAdmin/> AddDefaultCharset UTF-8 AllowOverride All <IfModule mod_authz_core.c> .....
Now, add the below contents to the file.
# vi /usr/share/phpMyAdmin/.htaccess AuthType Basic AuthName "Admin Login" AuthUserFile /etc/httpd/auth_pass Require valid-user
AuthType Basic specifies the authentication type that we are implementing. This type will implement password authentication using a password file. AuthName sets the message for the authentication dialog box. AuthUserFile sets the location of the actual password file that will be used for authentication. This should be outside of the directories that are being served. Require valid-user specifies that only authenticated users should be given access to this resource.
Now we will move on to create the Password File for Authentication. We can create multiple users by removing the -c option. We use this option to create the file as it doesn’t exists.
# htpasswd -c /etc/httpd/auth_pass myuser New password: Re-type new password: Adding password for user myuser
Finally, restart Apache service and access the phpMyAdmin page. You will be asked for the username and password we have just created.
# systemctl restart httpd.service
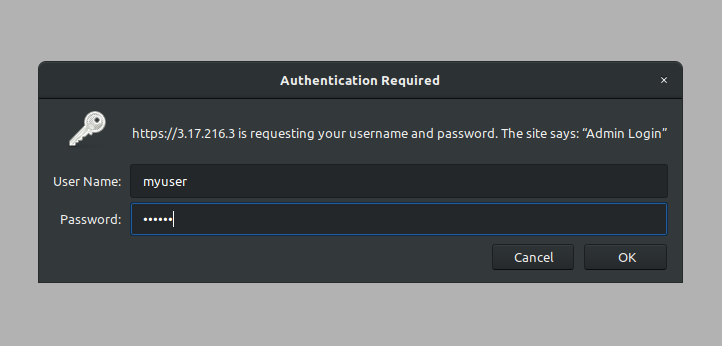
Now we will create a database user for our website and then will disallow root login. Login as root and click on users tab.
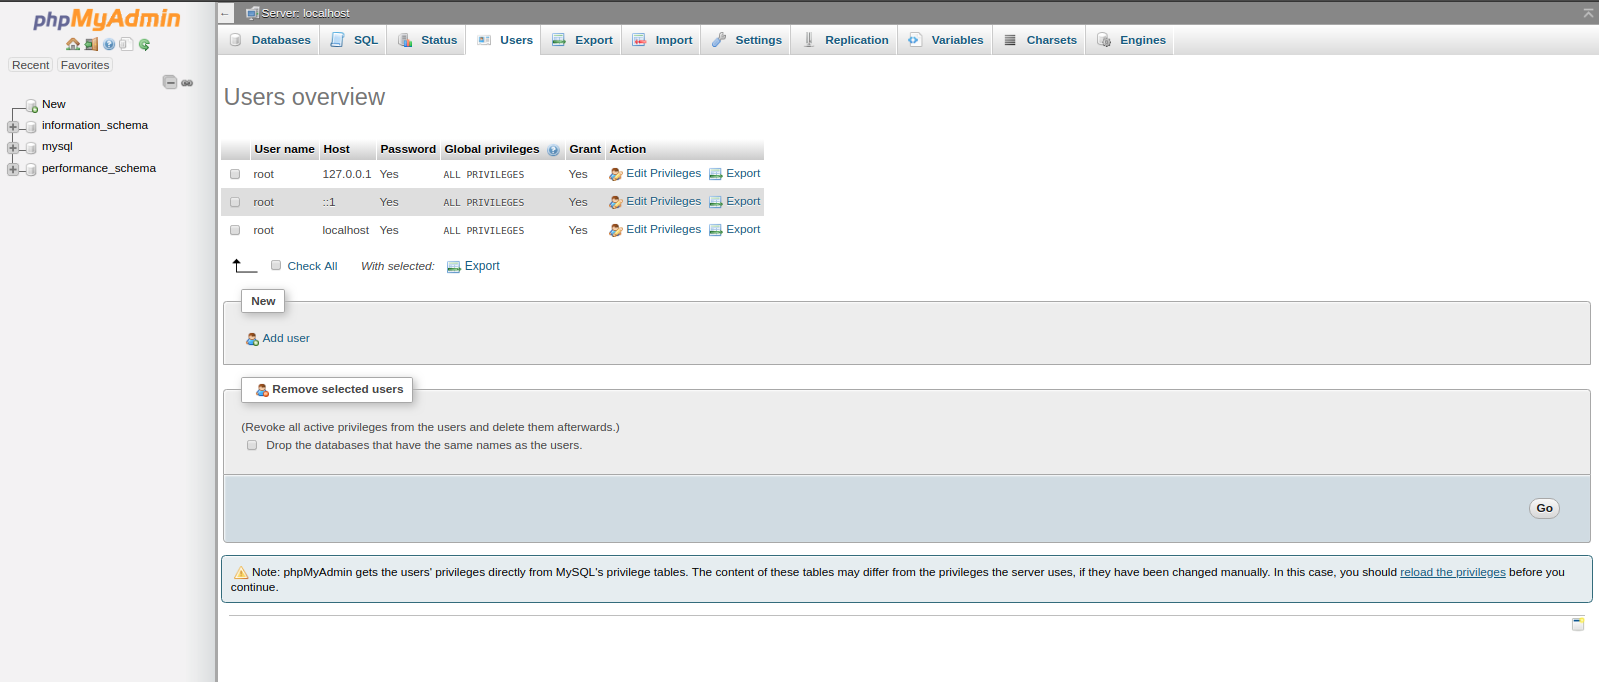
Add the username, password, host as localhost and select the required privileges. Finally click go in the bottom and a new user is created.
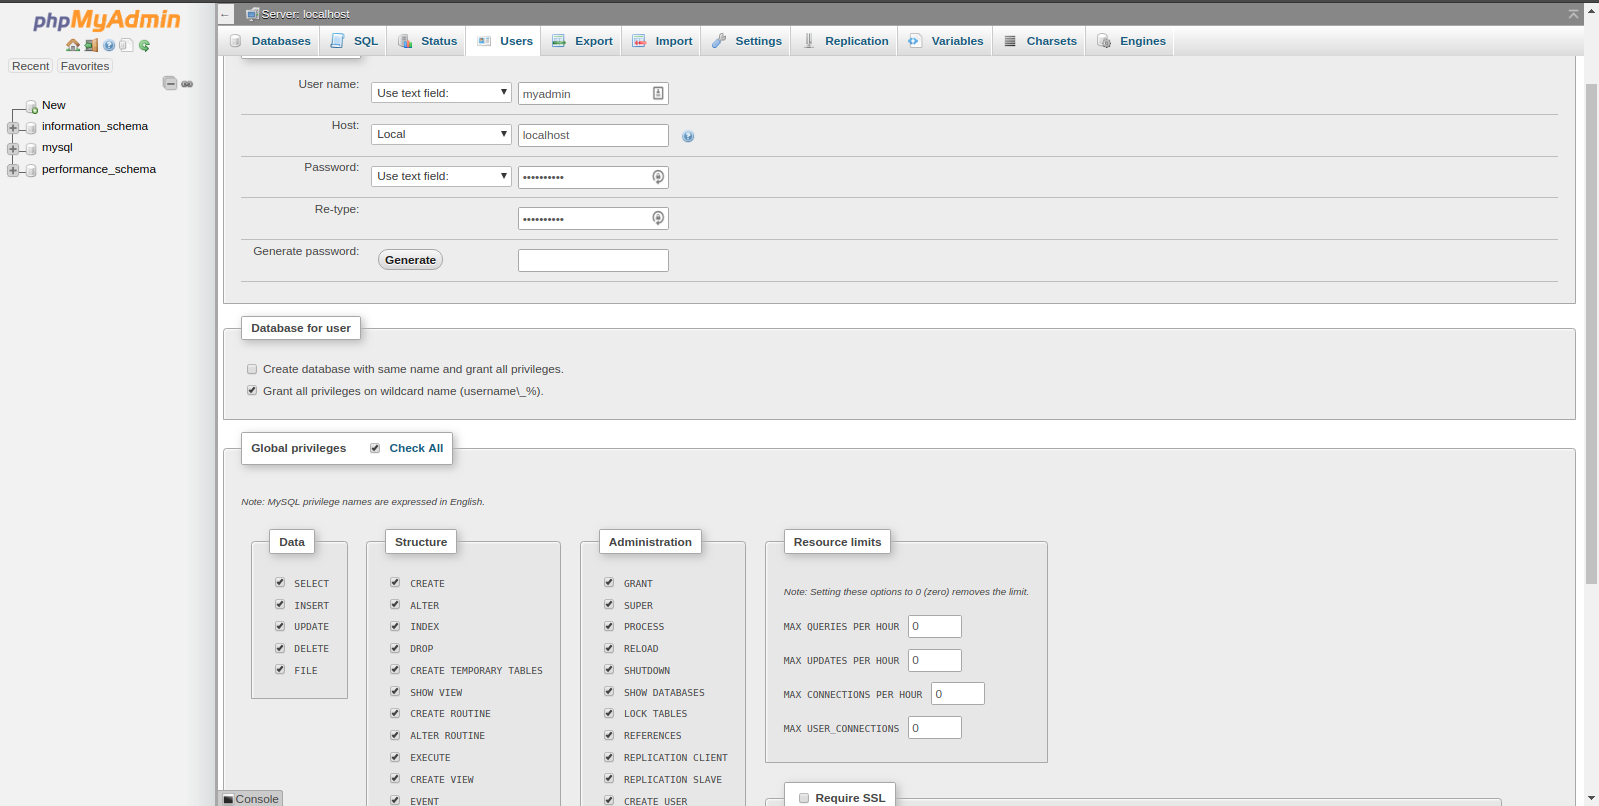
Now we will disable root login to phpMyAdmin by editing the phpMyAdmin configuration.
Change the line below line in /etc/phpMyAdmin/config.inc.php.
$cfg['Servers'][$i]['AllowRoot'] = TRUE; // whether to allow root login $cfg['Servers'][$i]['AllowRoot'] = FALSE; // whether to allow root login
Restart Apache service and try to login as root and you will get Access denied message.
# systemctl restart httpd.service
We have now installed and secured phpMyAdmin interface and access and will now move on to create a website
An easy way to build a website is by using a content management system like WordPress or Magento.
Here, we will create a WordPress site, a database and a database user.
To setup the server, you will need to follow the Part One of this series. Add virtual host by following Part Two. To setup database management tool, phpMyAdmin, see the Part Three.
Create a MySQL Database and User for WordPress using phpMyAdmin or from command line.
From the phpMyAdmin interface, click on users and add a new one. Tick the option create database with same name and grand all privileges option to get thinks done fast.

Now we will move on to install WordPress. Move to the base directory of the website.
$ cd /var/www/site1/public_html
Download the latest WordPress version and extract it. You may want to move the contents in the folder wordpress to public_html. The file does not contains the uploads folder and we will need to make one.
$ wget http://wordpress.org/latest.tar.gz $ tar -xvzf latest.tar.gz $ mv wordpress/* . $ rm -rf wordpress latest.tar.gz $ mkdir wp-content/uploads
Now we will edit the WordPress configuration and change the database. For that, first create the configuration file from the default sample.
$ cp wp-config-sample.php wp-config.php // ** MySQL settings - You can get this info from your web host ** // /** The name of the database for WordPress */ define('DB_NAME', 'wordpress'); /** MySQL database username */ define('DB_USER', 'wordpress');/** MySQL database password */ define('DB_PASSWORD', 'password'); /** MySQL hostname */ define('DB_HOST', 'localhost');
Now, you can complete the WordPress installation through the web interface. First, remove the test index.html that we have made in the previous parts so that the index.php will be loaded when the site is called. You may want to add host entry on your local machine and you can follow it in the Part two of this documentation.
Fill in the details and click on Install WordPress.

You will get a success page if everything goes right. Now login using the admin details to get to dashboard and edit the site.

Try calling the site and see the homepage.

You have now successfully installed WordPress on your server. Now you can add posts, pages or customize your site.