


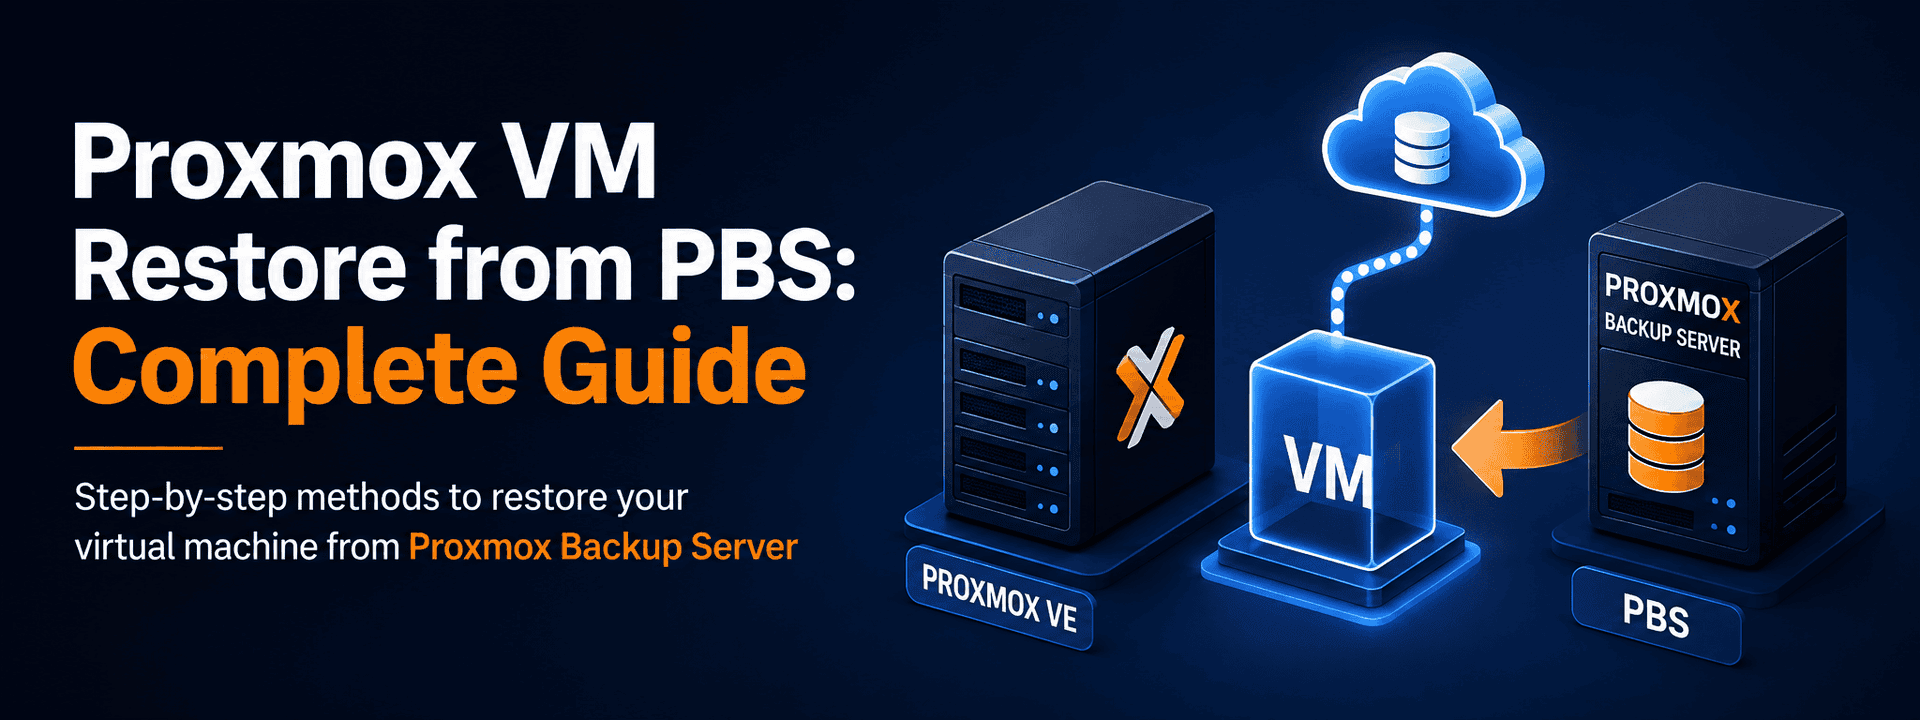
How to restore a virtual machine from Proxmox Backup Server - GUI and CLI methods, with troubleshooting
If you are running Proxmox VE with Proxmox Backup Server and need to recover a virtual machine, this guide walks you through the complete Proxmox VM restore from PBS process - from connecting storage to validating the recovered machine. This is written for sysadmins, Proxmox operators, and CloudOps engineers who need a reliable, repeatable restore procedure. Whether you are recovering from hardware failure, migrating a VM to a new node, or performing a DR drill, the steps here cover both the Proxmox VE web interface and the SSH command line - so you are not stuck if the web UI is unreachable.
What Is Proxmox Backup Server?
Proxmox Backup Server (PBS) is an enterprise-grade backup solution built specifically for Proxmox VE environments. Unlike generic backup tools, PBS uses client-side deduplication and chunk-based storage, which means only changed data blocks are transferred on each backup run. This makes backups fast and storage-efficient - and it also means restores are chunk-based, pulling only what is needed from the datastore.
PBS supports optional client-side encryption, namespace-based backup organisation, and granular retention policies. For teams managing multiple Proxmox nodes, a single PBS instance can serve as the central backup target for the entire fleet.
Two Restore Scenarios
This guide covers both situations you may encounter:
• Scenario A - PBS is already connected to the target Proxmox VE node. Skip straight to the Restore Process section.
• Scenario B - You are restoring to a new or replacement Proxmox node that has not yet been connected to the PBS datastore. Start with the Connect PBS Storage section below.
Before You Begin: Prerequisites
Gather everything in this list before starting. Missing any of these - particularly the encryption key - will stop the restore midway.
| Item | Where to Find It | Required For |
| PBS Server IP / Hostname | PBS dashboard or DNS record | Scenario B only |
| PBS Username | PBS → Administration → User Management | Scenario B only |
| PBS Password / API Token | PBS admin or password manager | Scenario B only |
| Datastore Name | PBS → Datastore list | Scenario B only |
| Encryption Key (.key) | Original PBS setup / secure storage | Encrypted backups only |
| PBS Fingerprint | PBS → Dashboard → Fingerprint | Scenario B only |
| Target VM ID | Backup details or original VM config | All scenarios |
| Destination Storage | Proxmox VE → Datacenter → Storage | All scenarios |
Pre-Restore Checks
- Confirm sufficient free disk space on the destination storage. Check under Proxmox VE → Node → Storage.
- Verify the target Proxmox node is online and reachable.
- If the original VM is still running on another node, decide whether to stop it first or restore to a new VM ID - running both with the same ID and MAC address will cause network conflicts.
- Confirm the network bridge used by the original VM (e.g. vmbr0) exists on the target node.
- Note the exact VM ID, storage pool, and backup timestamp you intend to restore
Encrypted backups: If the PBS datastore uses client-side encryption, the original .key file is mandatory. Without it, backup chunks cannot be decrypted and the restore will fail completely. There is no recovery path without the correct key - store it securely alongside your backup credentials.
Scenario B - Connect PBS Storage to a New Proxmox Node
Skip this section if PBS storage is already connected to your target node. Jump directly to the Restore Process section below.
Step B1 - Add PBS Storage in Proxmox VE
- Log in to the Proxmox VE web interface.
- Navigate to:
Datacenter → Storage → Add → Proxmox Backup Server- Fill in the following fields:
| Field | Value / Notes |
| ID | A descriptive name for this storage entry (e.g. pbs-main) |
| Server | PBS server IP address or hostname |
| Username | PBS username (e.g. admin@pbs or backup-user@pbs) |
| Password | PBS user password - leave blank if using an API token |
| Datastore | Exact datastore name as shown in PBS |
| Fingerprint | PBS TLS fingerprint - found on PBS → Dashboard |
| Namespace | Leave blank unless using PBS namespaces |
Step B2 - Import the Encryption Key
If the PBS datastore uses client-side encryption, complete this step before saving the storage entry:
- In the Add PBS Storage dialog, locate the Encryption Key field.
- Upload or paste the contents of the original .key file.
- Confirm the key matches the one used during the original backup run.
- Click Add to save the storage configuration.
✔ Key mismatch: If PBS lists backups but restores fail with a decryption error, the encryption key does not match. Always use the key from the original backup environment - a newly generated key will not decrypt existing chunks.
Step B3 - Verify Backup Visibility
- Open the newly added PBS storage entry.
- Navigate to:
PBS Storage → Content / Backups- Confirm expected VM backups are listed with correct IDs, timestamps, and sizes.
- If no backups appear, recheck the datastore name, credentials, and fingerprint.
Proxmox VM Restore from PBS - Step-by-Step
With PBS connected and verified, follow these steps to restore a VM. This process applies to both Scenario A and Scenario B.
Step 1 - Open PBS Storage in Proxmox VE
- Log in to the Proxmox VE web interface.
- Select the target node from the left panel.
- Navigate to:
Datacenter → Storage → [Your PBS Storage Name]
- Confirm the storage status shows as Active / Online.
Step 2 - Locate the Correct Backup
- Click the PBS storage entry and open the Backups tab.
- Find the backup for the VM you want to restore.
- Verify the following fields before proceeding:
| Field | What to Check |
| VM ID | Matches the VM you intend to restore |
| Backup Date | Correct timestamp - confirm you have the right snapshot, not an older one |
| Backup Type | Should show 'vm' for full VM backups |
| Backup Size | Reasonable size - unexpectedly small backups may be incomplete or failed |
| Verify | Optionally click Verify to confirm chunk integrity before starting restore |
Step 3 - Start the Restore
- Select the backup entry.
- Click the Restore button.
- The restore configuration dialog will open.
Step 4 - Configure the Restore Options
Fill in all fields in the restore window carefully:
| Option | Description | Recommended Setting |
| Target Node | The Proxmox node where the VM will land | Select the appropriate node |
| VM ID | ID for the restored VM on the target node | Use original ID if free; assign a new unused ID otherwise |
| Storage | Destination storage pool for VM disks | Select storage with sufficient free space |
| Start VM after Restore | Auto-start the VM once restoration completes | Leave unchecked - validate first, start manually |
| Override Settings | Force-restore even if a VM with the same ID already exists | Use with caution - will overwrite an existing VM |
| Unique MAC Address | Assign a new MAC to avoid conflicts if restoring alongside original | Enable if original VM is still running |
| Bandwidth Limit | Rate-limit restore throughput in MB/s | Set during business hours to avoid saturating I/O |
VM ID conflict: If a VM with the same ID already exists on the target node, the restore will fail unless Override Settings is checked. Verify you are not accidentally overwriting a live, running VM before enabling this option.
Step 5 - Run the Restore and Monitor Progress
- Click Restore to begin.
- The task will appear in the Task Viewer at the bottom of the Proxmox UI
During restoration, Proxmox will:
- Download backup chunks from the PBS datastore
- Verify chunk integrity if verification is enabled on PBS
- Recreate VM disks on the destination storage pool
- Restore the full VM hardware configuration - CPU, RAM, NICs, disk layout
Expected log output during a healthy restore:
restore vma archive: vzdump-qemu--.vma.zst
transferred: X.XX GiB
TASK OK
Step 6 - Post-Restore Hardware Verification
Before powering on the VM, verify the restored configuration is intact:
- Confirm the task log ends with TASK OK.
- The VM should now appear in the left panel under the target node.
- Open Hardware and verify:
■ Disk(s) are attached and show the correct storage pool
■ Network interfaces are present with the correct bridge assigned
■ CPU and RAM allocation match the original configuration
- Open Options and verify:
■ Boot order is correct - disk should be the primary boot device
■ KVM hardware virtualisation is enabled if the guest OS requires it
Step 7 - Start the VM and Validate
- Select the restored VM and click Start.
- Open the Console (noVNC or SPICE) to observe the boot process.
- Validate the following after boot:
| Check | How to Verify |
| OS boots cleanly | Watch the console - no kernel panics, fsck errors, or mount failures |
| Network connectivity | Run ping 8.8.8.8 or check IP assignment with ip a |
| Application services | Run systemctl status for key services |
| Disk mounts | Run df -h - all expected filesystems should be present |
| Hostname / IP address | Confirm correct if restoring to a different network segment |
✔ Memory ballooning: If RAM usage appears incorrect after restore, check whether VirtIO Balloon is enabled under Hardware. The balloon service must be running inside the guest OS. If it is missing or stopped, install the VirtIO balloon driver or disable ballooning and set static RAM allocation instead.

Restore via CLI Using qmrestore (When Web UI Is Down)
If the Proxmox VE web interface is unavailable - during a host failure, network incident, or disaster recovery scenario - the qmrestore command provides a full CLI alternative over SSH. This is an important fallback that the web UI cannot cover.
SSH into the Target Node
ssh root@<proxmox-node-ip>List Available Backups on PBS
proxmox-backup-client list --repository <user>@<pbs-ip>:<datastore>Run the Restore
Basic syntax:
qmrestore <storage-id>:backup/vzdump-qemu-<VMID>-<timestamp>.vma.zst <new-VMID>Full example with flags:
qmrestore PBS-storage:backup/vzdump-qemu-101-2026_07_01-02_00_00.vma.zst 101 \
 --storage local-zfs \
--uniqu
Key flags:
| Flag | Description |
| --storage | Destination storage pool for the restored VM disks |
| --unique 1 | Assigns a new unique MAC address - use when restoring alongside the original VM |
| --force 1 | Overwrites an existing VM with the same ID |
| --start 1 | Starts the VM immediately after restore completes |
Encryption via CLI: If the backup is encrypted, the .key file must be present at the default PBS key path or passed explicitly. A missing or incorrect key will cause the restore to fail - sometimes silently with a decryption error.
Common Issues and How to Fix Them
These are the most frequent errors encountered during a Proxmox VM restore from PBS, along with their root causes and fixes:
| Issue | Likely Cause | Fix |
| 502 / storage not accessible after adding PBS | Wrong fingerprint or credentials | Re-check PBS fingerprint under PBS → Dashboard. Re-enter credentials. Confirm port 8007 is open between the Proxmox node and PBS. |
| TASK ERROR: decryption failed | Wrong or missing encryption key | Import the original .key file used when the backup was created. A newly generated key will not decrypt existing chunks. |
| Restore fails: storage mapping error | Destination storage not present or not enabled on target node | Go to Datacenter → Storage. Confirm the target storage is enabled for the correct node. |
| VM boots but has no network | Network bridge mismatch between source and target node | Check VM → Hardware → Network Device. Ensure the bridge (e.g. vmbr0) exists on the target node. |
| Disk missing after restore | Restore task was interrupted or completed with errors | Check the task log. Re-run the restore - ensure it ends with TASK OK before starting the VM. |
| VM ID conflict on restore | A VM with the same ID already exists on the target node | Assign a new unused VM ID, or enable Override Settings with caution if you intend to overwrite. |
| Restore appears stuck / no progress | Large backup transferring, or PBS chunk store under load from GC/verify jobs | Check PBS → Administration → Tasks for competing jobs. Wait for them to complete or monitor bandwidth. |
| Memory balloon shows wrong usage | VirtIO Balloon service not running inside guest OS | Install or start the balloon service inside the VM, or disable ballooning and set static RAM in Proxmox. |
| Backups visible but restore denied | PBS user lacks Datastore.Modify or Admin privilege | On PBS, go to Administration → Access Control and grant the restore user the required privilege on the datastore. |
Frequently Asked Questions
Q: Can I restore a PBS backup to a different Proxmox node than the original?
A: Yes. PBS backups are not tied to a specific node. As long as the target node has access to the PBS datastore and sufficient storage, you can restore to any node in your Proxmox cluster - or even a standalone Proxmox VE host.
Q: What happens if I restore over an existing VM with the same ID?
A: By default, the restore will fail with a conflict error. You must either assign a new VM ID or enable the Override Settings option in the restore dialog. Overriding will permanently replace the existing VM configuration and disks - there is no undo. Make sure the VM you are overwriting is not live and critical.
Q: Do I need the encryption key to restore if I did not set up encryption?
A: No. The encryption key is only required if client-side encryption was enabled when the backup was originally created. If your PBS datastore does not use encryption, no key is needed.
Q: How long does a Proxmox VM restore from PBS typically take?
A: Restore time depends on backup size, disk type, and network throughput between PBS and the Proxmox node. A 100 GB VM over a local 1 Gbps link typically completes in 5 to 20 minutes. Restoring over a WAN link or from a slow storage backend will take longer. The Bandwidth Limit option can be used to throttle throughput during business hours.
Q: Can I restore individual files from a PBS VM backup without restoring the whole VM?
A: Not directly from the Proxmox VE UI. For file-level recovery, you would need to restore the VM to a temporary ID, boot it, and copy the files out. Alternatively, PBS supports mounting backup archives via the proxmox-backup-client tool, which allows browsing and extracting individual files from a backup without a full restore.
Conclusion
A Proxmox VM restore from PBS is straightforward when you know the right steps - but small oversights like a missing encryption key, a wrong VM ID, or a mismatched network bridge can turn a five-minute recovery into a frustrating delay. The process covered here - gathering prerequisites upfront, verifying backup integrity before restoring, using the full restore options table, and validating the VM methodically after boot - gives you a reliable, repeatable procedure for any recovery scenario.
Keep the CLI method bookmarked as a fallback. In real disaster recovery situations, the web UI is often the first thing that is unavailable - and qmrestore over SSH will get you back up when nothing else can.
Managing Proxmox infrastructure for your clients?
At SupportSages, our CloudOps engineers handle Proxmox setup, PBS configuration, VM backup and restore operations, and ongoing infrastructure management - so your environment stays recoverable and your team stays focused on what matters.
→ [email protected] | +91 77363 81410 | www.supportsages.com