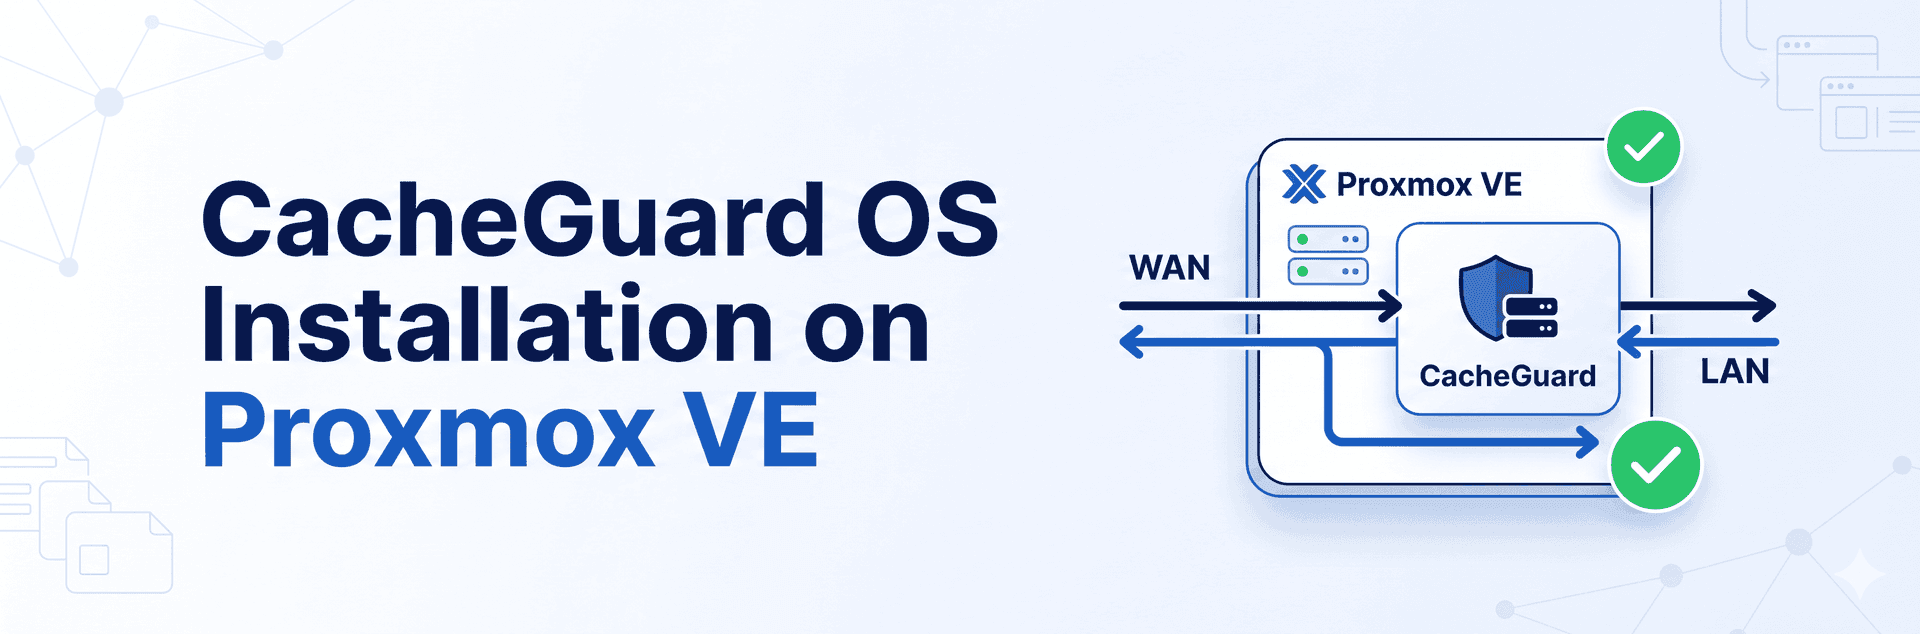
This guide walks through CacheGuard OS installation on Proxmox VE, from creating the virtual bridges to your first successful apply. It is written for system administrators, infrastructure engineers and support technicians who are setting up their first CacheGuard appliance in a virtual machine. You will learn which role to install, how to map virtual NICs to network zones, how to run the startup wizard safely, and how to diagnose common problems such as a missing bridge or a web GUI that times out. Every IP address below is an example, and every command should be checked against the manual for your installed release.
What Is CacheGuard OS and What Can It Do?
CacheGuard OS is a purpose-built operating system for network appliances. It turns an x86/x64 server or virtual machine into a network security and traffic-optimisation device. It is not an application you install on Ubuntu; it is the operating system of the appliance itself (the vendor writes it as CacheGuard-OS).
Depending on the design, a CacheGuard Gateway can provide:
Firewall and NAT for traffic crossing network zones
Forward and transparent proxy for browsing policy, authentication and logging
URL filtering and web antivirus to block unwanted sites and scan supported downloads
Reverse proxy and WAF to publish web applications without exposing the backend
VPN, caching, compression and QoS for remote connectivity and bandwidth control
Not every feature is enabled by default. Turn on only what your topology, licence, capacity and security policy require.
Forwarding, Reverse and Combined Modes
Mode | Protects | Traffic flow | Plan for |
Forwarding | Internal users going out | LAN client → internal interface → external interface → Internet | Explicit proxy needs client settings; transparent proxy needs redirect and routing design |
Reverse | Internal web apps receiving inbound requests | Internet user → reverse proxy / WAF → application server | Public DNS, certificates, backend addresses, allowed ports |
CacheGuard OS Installation on Proxmox: Step-by-Step Guide
This guide walks through CacheGuard OS installation on Proxmox VE, from creating the virtual bridges to your first successful apply. It is written for system administrators, infrastructure engineers and support technicians who are setting up their first CacheGuard appliance in a virtual machine. You will learn which role to install, how to map virtual NICs to network zones, how to run the startup wizard safely, and how to diagnose common problems such as a missing bridge or a web GUI that times out. Every IP address below is an example, and every command should be checked against the manual for your installed release.
What Is CacheGuard OS and What Can It Do?
CacheGuard OS is a purpose-built operating system for network appliances. It turns an x86/x64 server or virtual machine into a network security and traffic-optimisation device. It is not an application you install on Ubuntu; it is the operating system of the appliance itself (the vendor writes it as CacheGuard-OS).
Depending on the design, a CacheGuard Gateway can provide:
Firewall and NAT for traffic crossing network zones
Forward and transparent proxy for browsing policy, authentication and logging
URL filtering and web antivirus to block unwanted sites and scan supported downloads
Reverse proxy and WAF to publish web applications without exposing the backend
VPN, caching, compression and QoS for remote connectivity and bandwidth control
Not every feature is enabled by default. Turn on only what your topology, licence, capacity and security policy require.
Forwarding, Reverse and Combined Modes
Mode | Protects | Traffic flow | Plan for |
Forwarding | Internal users going out | LAN client → internal interface → external interface → Internet | Explicit proxy needs client settings; transparent proxy needs redirect and routing design |
Reverse | Internal web apps receiving inbound requests | Internet user → reverse proxy / WAF → application server | Public DNS, certificates, backend addresses, allowed ports |
Mode | Protects | Traffic flow | Plan for |
Combined | Both, on one Gateway | Forwarding and reverse together | Enough resources, separate zones (LAN, DMZ, management) and licensing |
CacheGuard Gateway vs Manager: Which Role Should You Install?
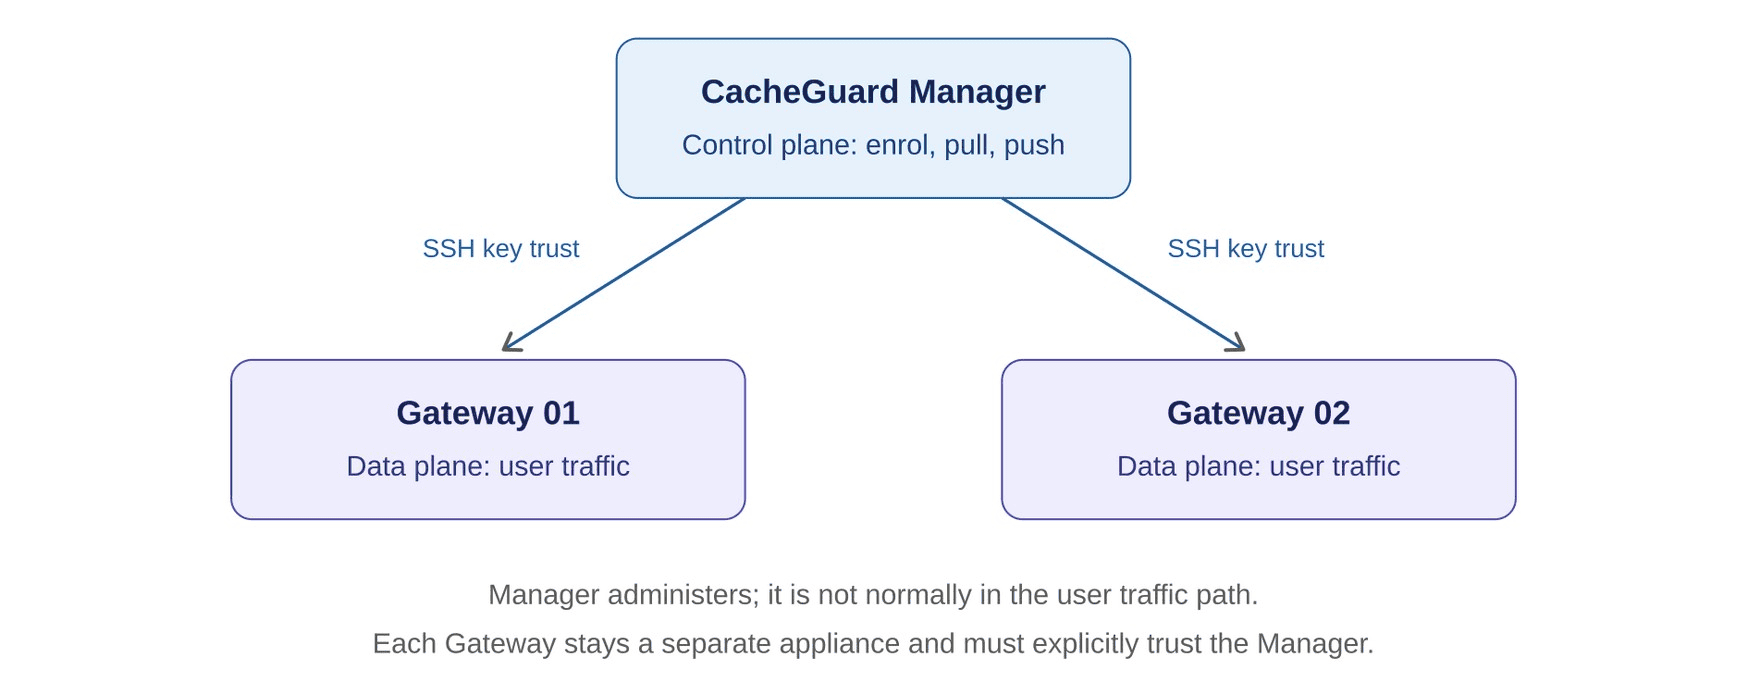
The installer asks you to choose a role. An installed system is a Gateway or a Manager, never both, so decide before you start.
Topic | Gateway | Manager |
Purpose | Traffic security and optimisation | Central administration of several Gateways |
Traffic path | Inline, or logically in the user or application path | Control plane; not normally in the user path |
Interfaces | At least two NICs (external and internal) | One internal management NIC may be enough |
Typical use | Protect a site edge or published web apps | Keep configurations consistent across remote Gateways |
A Manager does not replace a Gateway. To manage Gateways centrally, you allow the Manager's address on each Gateway, authorise its SSH public key, enrol the Gateway, then pull, edit and push configuration. These commands are illustrative, so verify them locally:
manager gateway add example-domain gateway-01 198.51.100.20
manager gateway pull example-domain gateway-01
manager gateway report pull
Why Run CacheGuard OS on Proxmox?
A virtual Gateway gives you a safe place to learn the appliance before it touches production traffic. On Proxmox VE you can:
- Rehearse the whole design. Bridges, virtual NICs and the startup wizard behave the same way in a lab as in production, so mistakes are cheap.
- Keep console access when networking breaks. The Proxmox console works even if you lock yourself out of the GUI or SSH.
- Separate zones clearly. One bridge for the WAN and one for the LAN make the zone mapping visible instead of implied.
If you also protect the VM with backups, see our guide on [INTERNAL LINK: restoring a VM from Proxmox Backup Server].

Can You Trust This Process?
This walkthrough follows the vendor's documented concepts: a Gateway needs at least two NICs, and the same installation media installs either role. You can confirm both in the CacheGuard installation guide. The steps were recorded on a representative lab deployment running CacheGuard OS UF 2.6.3 on Proxmox VE 9.x.
Two honest caveats come with that record:
- Version differences matter. The online command manual we reviewed described UF 2.6.1, while the lab ran UF 2.6.3. Use the built-in help command on your own release, and do not copy commands from another version.
- The lab was not fully finished. Core services started successfully and the GUI login page loaded, but a later GUI page timed out and was not resolved in that session. That is why the troubleshooting section below teaches you to isolate layers instead of promising a single fix.
Planning Before You Start
Plan these resources and decisions first. The sizes are a starting point for a small lab, not a sizing guarantee.
Resource | Small lab starting point | Why it grows |
CPU | 2 to 4 vCPU | Antivirus, TLS inspection and compression are CPU intensive |
RAM | 4 to 8 GB | Antivirus and concurrent features need more memory |
Disk | 40 to 250 GB | OS, cache, logs, retention and backups |
NICs | At least 2 for a Gateway | Add interfaces or VLANs for DMZ, HA or multi-WAN |
Before installing, confirm the following:
- The installation formats the selected disk, so back up anything important first.
- You downloaded the correct architecture and release ISO from the official source.
- You have your WAN and LAN plan, plus the provider's IP, gateway, prefix and virtual MAC (vMAC) instructions if you use an Additional IP.
- You have Proxmox console access and a rollback plan.
- DNS, NTP and timezone, certificates, logging and backups are planned.
CacheGuard OS Installation on Proxmox: Step by Step
Step 1: Create and Check the Proxmox Bridges
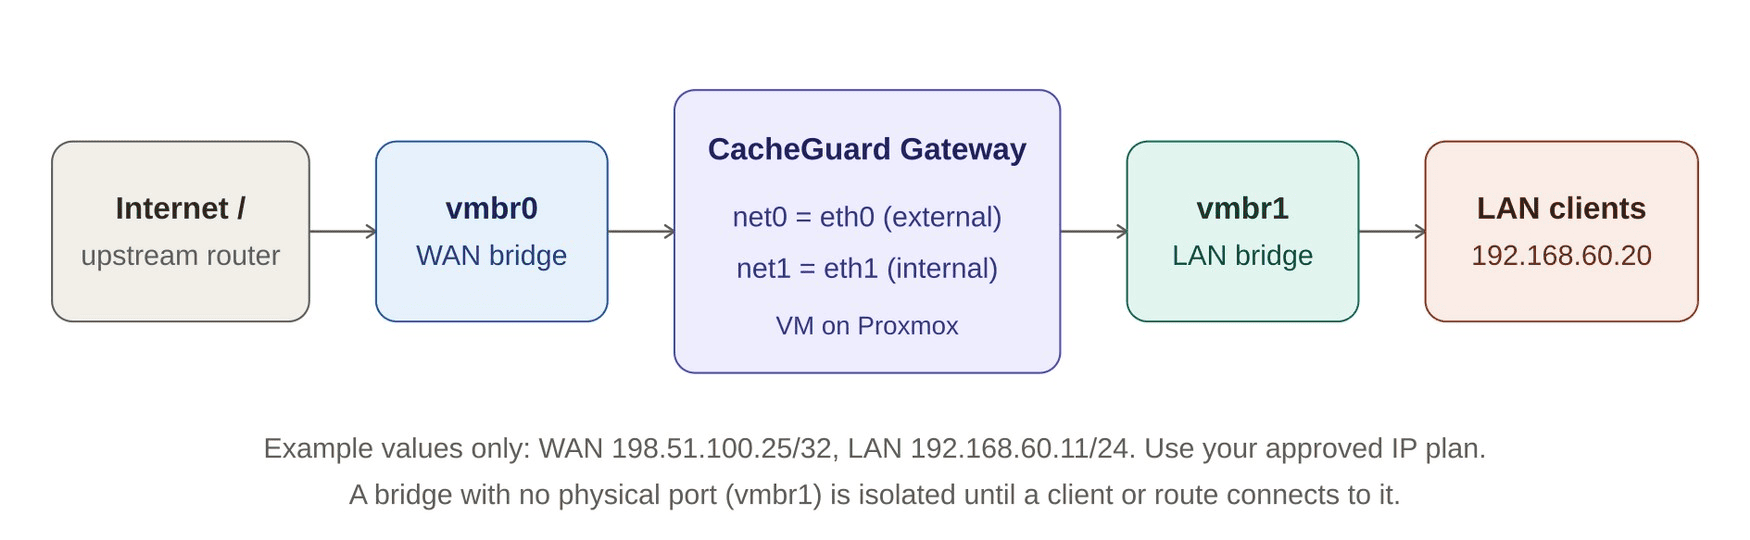
Open Node → System → Network and confirm each bridge's status, ports, CIDR and gateway. In this design vmbr0 is the WAN bridge on a physical NIC, and vmbr1 is an isolated LAN bridge with no physical port. An isolated bridge is a valid lab choice, but nothing outside it can reach it without a client or route. Bridge behaviour is covered in the Proxmox network configuration documentation.
An illustrative isolated bridge looks like this:
Caution: Changing Proxmox host networking can cut off your management access. Save the current configuration, keep out-of-band access, and apply changes in a maintenance window.
auto vmbr1
iface vmbr1 inet manual
bridge-ports none
bridge-stp off
bridge-fd 0
Step 2: Create the Virtual Machine
- Choose Create VM, then set a VM ID and a descriptive hostname.
- Attach the official CacheGuard ISO.
- Create a disk large enough for the OS, cache, logs and retention.
- Allocate CPU and RAM from the planning table above.
- Add two network devices: net0 on vmbr0 (external) and net1 on vmbr1 (internal).
- If your provider issued a vMAC for an Additional IP, assign that exact MAC to the WAN NIC.
- Review hardware and boot order before you start the VM.
Step 3: Install from the ISO
- Boot the VM from the ISO and follow the installer.
- Select Gateway or Manager deliberately.
- Confirm that the target disk can be formatted.
- Choose persistence, logging and capacity options that fit your design.
- When installation succeeds, detach the ISO or set CD/DVD to Do not use any media.
- Put the virtual disk first in the boot order and reboot.
If the QEMU Guest Agent is not available, Proxmox may report ping or shutdown timeouts. Shut down gracefully from the guest console. Use a forced stop only as a last resort, because it is the same as pulling the power.
Step 4: Run the Startup Wizard
The first console login starts a guided setup for basic networking. Do not assume the displayed defaults match your design.
- Static: use when you were given a fixed address, mask and gateway.
- DHCP: use only if the upstream network leases an address to that interface.
- PPPoE: use only if the provider supplied PPPoE credentials. Example values from the lab (illustrative only):
Field | Example |
Internal eth1 IP / mask | 192.168.60.11 / 255.255.255.0 |
External eth0 IP / mask | 198.51.100.25 / 255.255.255.255 |
Default gateway | 100.64.0.1 |
The wizard may show the commands it plans to run. Read them before confirming. A displayed default route does not prove the gateway is reachable or that the provider has routed your IP correctly.
Step 5: Apply and Verify
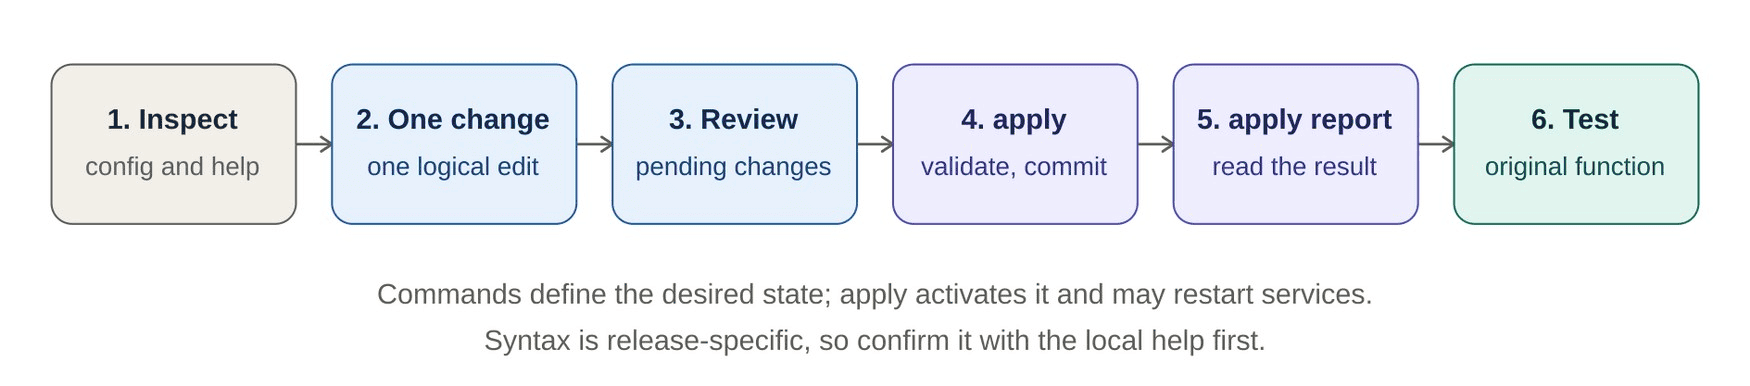
CacheGuard separates entering configuration from activating it. Commands define the desired state, and apply validates and commits it, which can restart services. Then apply report shows the result. These basic commands are illustrative, so confirm the syntax locally:
ip external <address> <netmask>
ip internal <address> <netmask>
ip route add default <gateway>
dns add <dns-server>
admin ssh on
admin wadmin on
apply
apply report
A safe working loop is shown below. Service stop and start lines during an apply are expected.
 Administration Access vs Firewall: Avoid Locking Yourself Out
Two command families control different traffic, and mixing them up is a common reason for a GUI timeout.
Command family | Controls | Example question |
access | Traffic going to CacheGuard itself, including SSH and the web GUI | Which trusted sources may open the appliance GUI? |
firewall | Traffic routed through CacheGuard between networks | Can a LAN client reach a server in another network? |
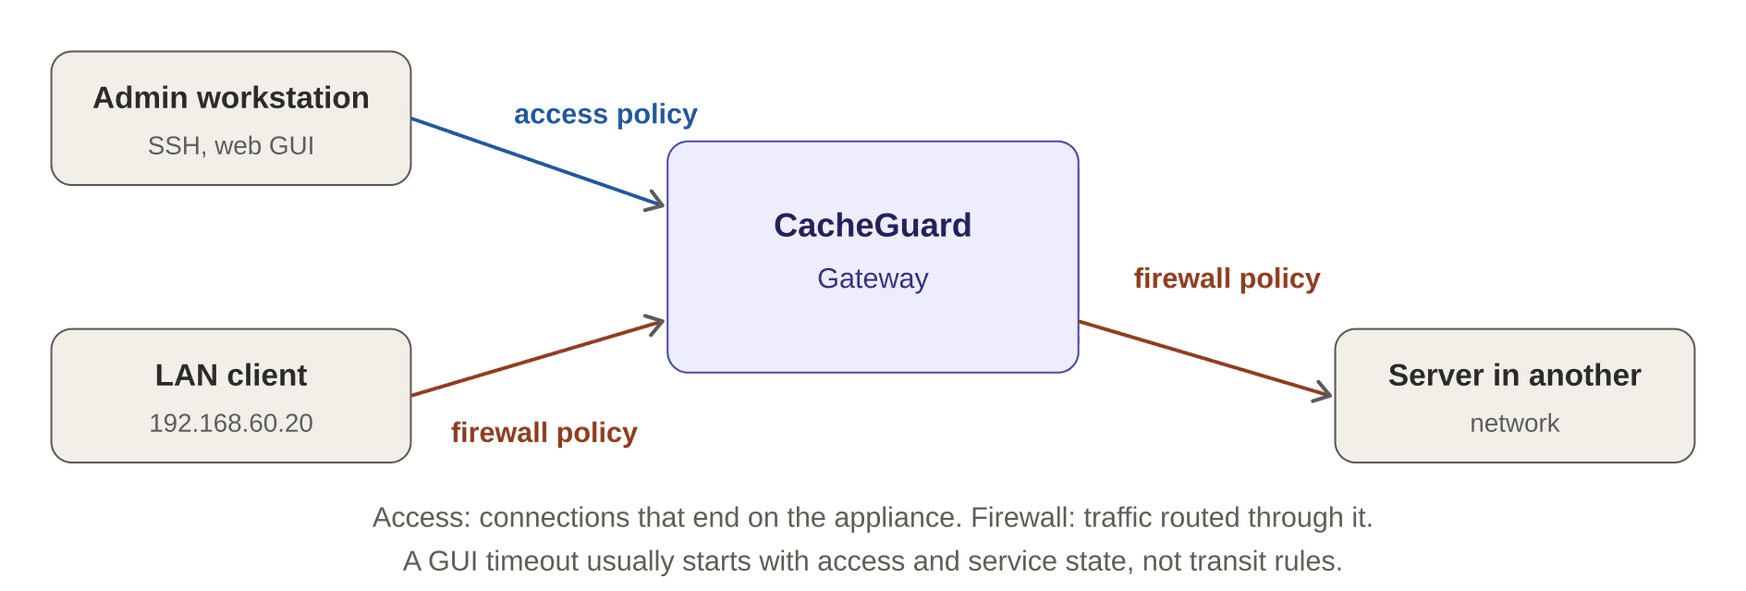
The web GUI is an HTTPS interface, commonly on TCP 8090. Because that connection ends on the appliance, check service state and the access policy first, not transit firewall rules.
Keep administration tight:
- Enable SSH and the web GUI only when needed, and limit them to trusted administrator networks.
- Prefer a VPN or dedicated management network. If a public path is unavoidable, restrict it to your administrator's public IP (/32) and add provider firewall controls.
- Treat raz and any reset or clear form as potentially destructive until the local manual confirms its scope. Never use one as a read-only check.
To test the GUI properly, confirm the apply finished, confirm the web administration listener, confirm your source IP is trusted, test TCP reachability from the intended workstation, then load the login page and a second GUI page. A login page alone is not full validation.
CacheGuard OS Troubleshooting: Common Errors and Fixes
Symptom | Likely cause | What to do |
Proxmox: bridge vmbr1 does not exist | VM references a bridge that was never created or applied | Create it under Node → System → Network, apply safely, confirm it is active, then start the VM |
VM boots the installer again | ISO still attached, or CD/DVD first in boot order | Set CD/DVD to Do not use any media, put the disk first, reboot |
Symptom | Likely cause | What to do |
Guest Agent ping or shutdown timeout | Agent missing, or guest unresponsive | Use the console and shut down gracefully; force stop only as a last resort |
Private GUI times out | Workstation is not on or routed to the private subnet, or the bridge is isolated | Check client route, bridge topology, interface mapping, service state and trusted access |
Public GUI times out | Wrong IP or vMAC, missing route, provider filtering, access policy, listener or return path | Verify provider IP and vMAC, route, listener, access rules and every firewall in the path, then run a TCP test |
Login page loads, later page times out | Intermittent routing, resource pressure, service or session issue | Compare the trusted LAN or VPN path with the public path, inspect logs and health, test a simple page |
/32 WAN address cannot reach its gateway | Provider may need an on-link route, routed-IP method or vMAC | Follow the provider's Additional IP guide and verify the vMAC and guest route |
A firewall command returns <null> | The form you typed may not be a list operation | Read the local manual for read-only syntax; do not assume the rule set is empty |
GUI unreachable after an access change | Your source network is no longer trusted, or the service is off | Use the Proxmox console, inspect access and admin, restore a trusted path, apply, retest |
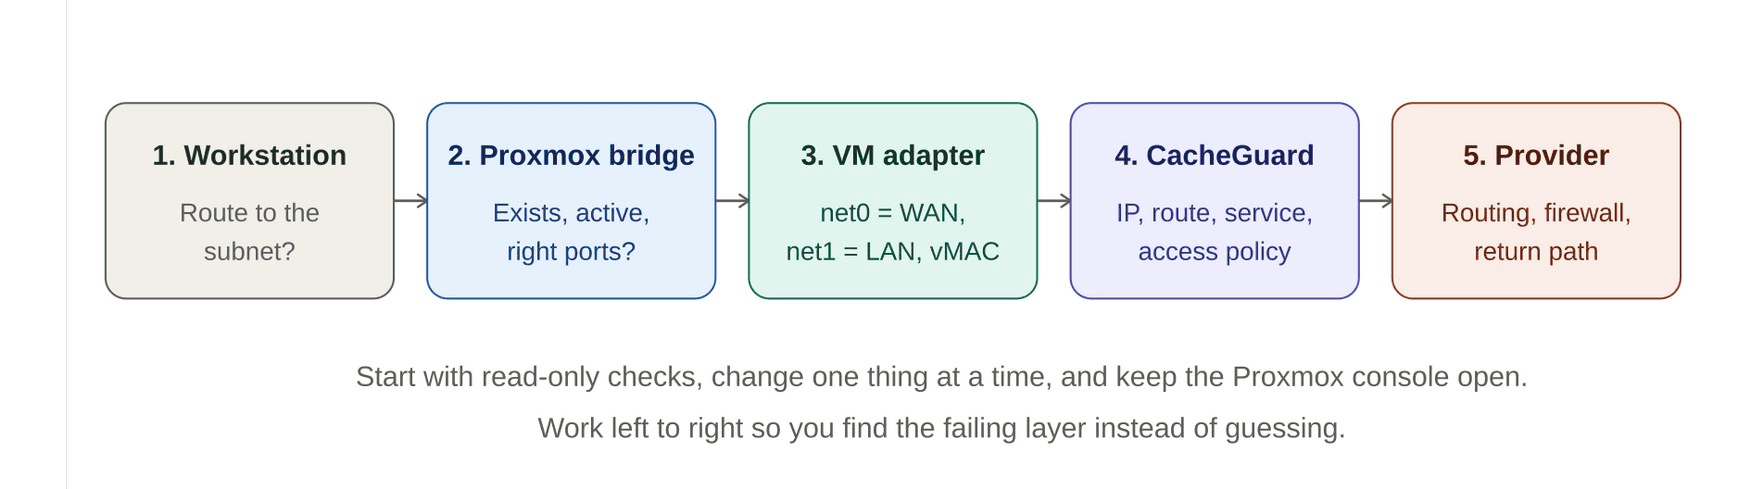
Work through the layers in the diagram from left to right:
- Capture the exact error, timestamp and last known-good state.
- Start with read-only checks and change one thing at a time.
- Do not reset firewall rules or expose services broadly without understanding the impact.
- Keep console access open while you change networking or administration policy.
- After each change, apply only when required, read the apply report and retest.
A failed ping alone does not prove routing is broken, because an upstream device may drop ICMP. A successful ping does not prove the GUI port is reachable either.
What Should You Do Next?
Once the Gateway applies cleanly and you can reach the GUI from a trusted path, prepare it for real use:
- Back up the known-good configuration, and test a restore.
- Restrict SSH and the web GUI to approved administrator sources, and verify TLS certificates and fingerprints.
- Set accurate time, timezone and NTP, then monitor CPU, RAM, disk, cache and log retention.
- Document your NAT, route, proxy, WAF, VPN and reverse-proxy rules, and review firewall and access policies regularly.
- Patch according to vendor release guidance, and test changes in a lab first.
Do not call the deployment production-ready until GUI access, routing and trusted administration are stable. For general server-side hardening, see our guide on [INTERNAL LINK: securing SSH and firewall access on Linux servers].
FAQ
Can one installation be both a Gateway and a Manager? No. Each installed system is configured as one role. Install the Manager on a separate machine and enrol your Gateways from it.
Do I need two NICs for a lab Gateway? Yes, for a standard Gateway you need at least two: one external and one internal. A Manager can often work with a single internal management NIC.
Why can't I open the GUI on its private address? If the internal NIC sits on an isolated Proxmox bridge, a workstation outside that bridge has no path to it. Attach a client to the bridge, add a route, or use another secure management path.
Does a successful ping mean the web GUI will work? No. Ping tests ICMP, while the GUI needs a TCP connection to its port. Test TCP reachability from the intended workstation, and load more than the login page.
Conclusion
A reliable CacheGuard OS setup comes down to a few habits: choose the role first, map every virtual NIC to the right bridge and zone, review wizard commands before confirming, and keep access policy separate from transit firewall rules in your head. When something fails, check one layer at a time and keep the Proxmox console open.
Ready to try it? Build this lab on a spare Proxmox VM, run apply report, and work through the troubleshooting table before you place the appliance anywhere near production traffic.