Published on: July 15, 2010 by Faheem P.
Scenario:
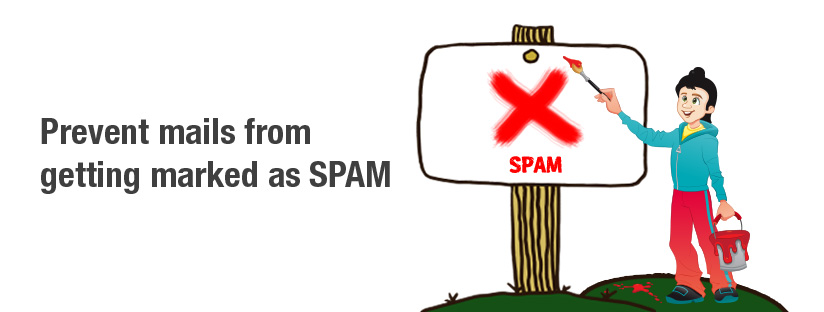
Spam and Spam prevention ! Two words familiar to all Netizens.
Emails plays a major role in today’s business, one must be keen to preserve the authenticity of mails they sent to the users and fail to do so may result in getting your mail server IP blacklisted and mails ends-up in users junk folder and they die!
This post is not a perfect guide to prevent you from getting blacklisted by the spamcops, but a few tips that could save your “Time” and “Reputation”.
1) All email is filtered against published blacklists of spam servers. Check whether your mailserver IP is already blacklisted : http://www.mxtoolbox.com/. If listed, take necessary actions to remove it. You can temporarily switch the mail server IP to get the mails moving until your regular IP is released.
2) All mails will be filtered based on certain rules. It looks for senders email address, mail subject line and words on the message content. Avoid using blank subject line and using common spammers words like “offer, discount, sale, free etc… There are a lot more..
3) Maintain a regular time intervals while sending mails to a particular sender. This could be setup on exim configuration file. (Needs admin privileges)
4) Enable SPF:
Sender Policy Framework (SPF), is an e-mail validation system designed to e-mail spam prevention by addressing a common vulnerability, source address spoofing. SPF allows administrators to specify which hosts are allowed to send e-mail from a given domain by creating a specific DNS SPF record in the public DNS for that domain. Mail exchangers then use the DNS to check that mail from a given domain is being sent by a host sanctioned by that domain’s administrators.
If SPF record is enabled for a domain, spammers and phishers are less likely to forge e-mails pretending to be from that domain. Spam filters now check for SPF records and hence eliminate the chance of forged mails, spams. Hence an SPF protected domain is less attractive to spammers and phishers and is less likely to be blacklisted by spam filters and ligitimate mails will go through.
SPF keeps the detail of the machine which is only authorized to send mails for that particular domain. This is done by adding additional a TXT record to their existing DNS records. Mail receivers that checks for SPF records check the domain DNS and finds whether the server is allowed to send mails for that domain.
The key issue in SPF is the specification for the new DNS information that domains set and receivers use. Eg is :
example.com. IN SPF “v=spf1 a mx -all”
“v=” defines the version of SPF used. “v=” defines the version of SPF used. The following words provide mechanisms to use to determine if a domain is eligible to send mail. The “a” and “mx” specify the systems permitted to send messages for the given domain. The “-all” at the end specifies that, if the previous mechanisms did not match, the message should be rejected.
On a cPanel server, one can easily enable SPF records.
Login to cPanel account for that particular domain ==> Email Authentication ==> Scroll down to SPF section ==> and Click on Enable.

Enable SPF :

SPF record on Domain DNS.
![]()
5) Enable SenderID:
Preventing spoofing is also important as spam prevention, SenderID is an anti-spoofing method to save emails from Junk. SenderID is heavily based on SPF with a few additions. Like in SPF, DNS entries are used on the domain DNS to ensure the authenticity of emal. But they differ on what rules they apply to what fields contained in the message header.
How SenderID works:
DNS entry for SenderID enabled domain looks like,
![]()
You can get more details about the SenderID from the following link
6) Enable Domain Keys:
DomainKeys is the branded name created by Yahoo. It has been introduced by Yahoo for spam prevention. DomainKeys is a PGP-like (Pretty Good Privacy) protocol for validating and authenticating an email. This system includes the creation of a public and private key. You keep your private key private and give your public key to your trusties. We encrypt data with our private key and users can decrypt messages with our public key. This prevents others from seeing our data. Domain Keys takes this idea one step further. Instead of encrypting the email, it encrypts the email headers and creates a hash value from that encryption. The hash value is send/placed in the email header. When a site receives an email, it locates the public key which is located in the DNS server for the user listed in the From: line of the email and encrypts the email once again to compare the hash value. If the hash values match after the second encryption test, the email passes validation.
DomainKeys is an system that allows for incoming mail to be checked against the server it was sent from to verify that the mail has not been modified and thereby ensures that messages are actually coming from the listed sender and allows abusive messages to be tracked with more ease.
Yahoo check for domankeys on a domain if they are requested to whitelist the IP. Below are the steps to enable DomanKeys on a cPanel server.

DNS entries for DomainKeys and SPF
![]()
Once DomainKeys are enabled you can check whether it is setup correctly by sending a test mail addresses set up to dk@dk.crynwr.com
7) Enable DKIM :
DKIM is the result of combining Yahoo’s DomainKeys technology with Identified Internet Mail which was developed at Cisco which is another methodology of PGP-like technique.
DomainKeys and DKIM sounds similar but there are different. DKIM was created to provide a more robust solution that would survive more types of modification to which messages are frequently subjected. DomainKeys Identified Mail (DKIM) lets an organization take responsibility for a message while it is in transit. The organization is a handler of the message, either as its originator or as an intermediary. Their reputation is the basis for evaluating whether to trust the message for delivery. Technically DKIM provides a method for validating a domain name identity that is associated with a message through cryptographic authentication.
DKIM is not available as a ready-made option in cPanel server till now. If you are running an VPS and know basic administration, you can get it enabled. Login to the server via SSH and check if if exim is compiled with DKIM support enabled.
root@server # /usr/sbin/exim -dd 2>&1 | grep Experimental_DKIM

Support for: crypteq iconv() IPv6 PAM Perl OpenSSL Content_Scanning Old_Demime Experimental_SPF Experimental_SRS
Experimental_DomainKeys Experimental_DKIM
Generate the SSL keys
cd /usr/local/cpanel/etc/exim
openssl genrsa -out dkim.key 1024
openssl rsa -in dkim.key -out dkim.public -pubout -outform PEM
You will find two keys, dkim.key & dkim.public
Open dkim.public and copy the contents excluding the –Begin– and –End– section. This is your DKIM key. Now open exim configuration file and append the below entries under the section ‘remote_smtp’
Sample file:
vi /etc/exim.conf
remote_smtp
driver = smtp
dkim_domain=your_domain_name.com
dkim_selector=mail
dkim_private_key=/usr/local/cpanel/etc/exim/dkim.key #path to the dkim.key key.
interface = ${if exists {/etc/mailips}{${lookup{$sender_address_domain}lsearch*{/etc/mailips}{$value}{}}}{}}
helo_data = ${if exists {/etc/mailhelo}{${lookup{$sender_address_domain}lsearch*{/etc/mailhelo}{$value}{$primary_hostname}}}
{$primary_hostname}}
Now on WHM, open DNS editor for the particular domain and add the TXT entry with DKIM key like below.
mail._domainkey.example.com. IN TXT "v=DKIM1;g=*;k=rsa; p=GIGmGA0GCSqGSIb3DQEBAQUAA4GNADCBiQKBgQDv4PSEG9PcxlI2tRojAUQ9hpRQ0Zj/XG4SK08/DrhG/CaspJAKZm9rZDAw18TrmuXeRgsGWAdS2vJ4Oa/kXqX0NG2eBJcGasu4GeNXANGXvC1uGz+8GC6rEPlE/Ucau4tGAHOZL0HJ9IDd/PIxoTkeTG3GjGeqvKBLbdvVIDXbcQIDAQAB"
Here p=the_key_you_have_copied_from_dkim.public
Restart exim and named services.
/scripts/restartsrv exim
/scripts/restartsrv named
To check whether DKIM is setup properly, send a mail to dkimtest@atmail.org , if setup properly, you will get a reply like below ,else a failure message.
———————
Subject: AutoReply from dkimtest@atmail.org
From: spftest@example.com
Date: Fri, Jul 9, 2010 10:27 pm
To: spftest@example.com
*** DKIM TEST SUCCESSFUL ***
———————-
8 ) Join JMRP :
Another service which can be used in spam prevention is JMRP/Junk Mail Report Program is a free service to provide reports on junk e-mail issues reported by Windows Live Hotmail users. You can use this free service to which is developed commercial mailers and e-mail administrators to identify/fix issues in sending mails to hotmails ID’s. JMRP returns the full message with headers of any e-mail marked as “junk” or “phishing” by a recipient. Provides senders an opportunity to clean their e-mail lists and improve the quality of their content and helps identify potential problems with your marketing practices and content and also improves sender reputation by removing unwanted subscribers from lists.
You can join LMRP from here : http://bit.ly/JMRP
N:B :- Mail server mentioned here is cPanel Exim, you may replace this with any other mail server.
Category : cPanel, Howtos, Linux, Webmail

Faheem enjoys learning new technologies and loves to implement cutting edge solutions. He is one of the most active member in various technical forums and is a familiar face in various brain storming sessions. He takes great pride in being an explorer and the best thing you can be sure about in his room is the backpack!!


Add new commentSIGN IN