Published on: October 14, 2015 by Hariram JR

Scenario:
One of my client experienced frequent MySQL downtime on his server. The VPS server had a couple of accounts with relatively normal traffic. The MySQL error log and server load during the MySQL crash too failed to show up any unusual events.
On further investigation, the server log /var/log/messages, indicated that the server had been suffering from resource scarcity and hence OutOfMemory (OOM) killer was triggered at multiple occassions. The time of MySQL crash was in perfect synchronization with the OOM killer entries in the server logs and which made me to suspect a link between the two.
Below is the screen shot of the error message we received

As you can see from the above screen shot the MySQL process 11079 had been killed due to Out Of Memory issues.
As usual I had checked the available primary memory for the VPS and the output showed nearly zero/low free memory availability.

Strikingly, there were no swap partition enabled for the server and the client was not in a position to increase the RAM allocation. So to improve the server performance a swapping system is the only available choice and hence I had decided to move forward with setting up a new swap partition for the server. Moving the inactive process to swap space, even when sufficient RAM is available, will help the physical RAM to spend its penny available memory to some other process.
Swap partition or Swap file?
Normally swap partitions are created during installation during disk partitioning. Or you can dedicate a new entire hard disk or partition for swap partition. However since its VPS there is no scope for attaching a new HDD or partition to be used as a Swap partition.
A swap file is file on the HDD which acts as temporary storage location for the less frequently used memory pages from your primary memory. New Linux kernels support swap files to a great extend and swap files are now just as fast as swap partition. Hence I decided to proceed with creation of a swap file to add swap space on the live server.
Before that, I would like to make you familiarize with the below commands.
===
swapon & swapoff – The commands which is used to enable and disable the swap files.
fallocate – The command utility which helps to preallocate the space to a file.
mkswap – The command used to create a swap area on the device
===
How to Add Swap space?
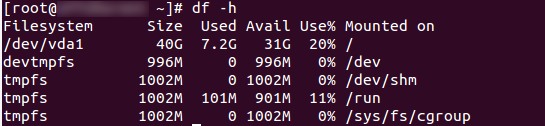
Before creating a swap file, check the disk usage in the server.
 .
.
This is an important check as the size of swap is usually double the size of RAM. Here the RAM size is approx. 1G and the proposed swap file size is 2 GB, so it is essential that the space is available. Here the free space is much more beyond the required space and hence we can proceed with add swap space.
Swap file creation
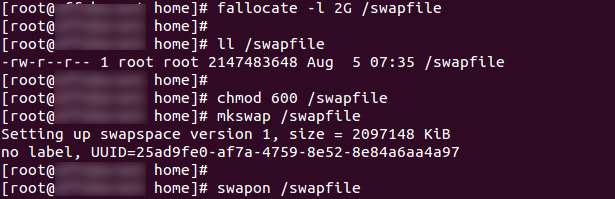
1. Use fallocate command to preallocate space to the swapfile.
#fallocate -l 2G /swapfile
2. List the created swap file and identify permissions
#ls -lh /swapfile
3. Change the permission of /swapfile to 600 so as to allow only the root user to read and make changes to the file.
#chmod 600 /swapfile
4. Use mkswap command to instruct the server to designate and mark the file “/swapfile” to be used for swapping
#mkswap /swapfile
5.After the successful creation, we have to enable the swap file using the command swapon to take effect.
#swapon /swapfile
Below the the screen shot of the steps for your reference
Mounting the Swap
6. To mount the swap partition permanently, add the swap information in the /etc/fstab
/swapfile swap swap sw 0 0
Verification
6. Finally we need to confirm whether swapping actually happens or not
If you get the result of swapon -s in the terminal then the swap space is successfully configured in the server.

7. Then, run the free or vmstat command to check the usage of swap memory in the server.

Hope, this article helps you. Thanks for your time 🙂
![]()
Category : Howtos, Linux, VPS

System Engineer with two years of experience in deploying and managing hundreds of Linux servers. Currently working in Cloud technologies, especially with AWS platform. His work includes installing application server, scaling and configuring it for high availability and fault tolerance.


Add new commentSIGN IN