Published on: January 5, 2017 by Jinta George

Scenario:
Before moving on to discuss how to reduce DNS propagation time during transfer, let’s have a look at what actually DNS propagation time means.
Sometimes modifications of DNS records such as NS, MX, A etc. are imperative for a domain during migrations or any such activities. However, the changes may not reflect across the Internet instantaneously due to the presence of DNS cache in ISPs. Each ISP keeps its own DNS cache for the DNS records of recently accessed domains to speed up the DNS lookup process during the next query. Since these cache records have an active life span of a specified time period, all requests from the ISP will rely on the information of the cached file till its expiration. So the modified data will be fetched to the ISP cache only after the expiration period and the time interval for the process is known as “Propagation Delay”.
The actual time of propagation may vary based on Time To Live ( TTL) value specified for each DNS record in the authoritative name servers.
The life span of cache DNS records in the ISP is controlled by Time To Live (TTL) value set in the resource records. For eg. let us assume that the TTL for the records is set to 86400. Which means a cached server ie ISP will check for any modifications only after 86400 seconds or one day. So if you make a change in the DNS records of a domain in the name server, it can take up to 24 hours to reflect in your ISP.
Let us assume that the hosting account has moved to a new server and the A record for the domain has been changed to 2.2.2.2 from the previous IP 1.1.1.1. Since some of the ISPs still holds active cache records they continue to serve the pages from the IP 1.1.1.1 while non-cached ISPs loads the actual page from 2.2.2.2. This inconsistency will create confusions and chaos for websites which deals with more sensitive and dynamic data such as online shops and news portals.
Here I am changing the A record of the above-mentioned domain with minimal DNS propagation delay. As we had seen earlier, the most crucial element in DNS propagation delay is the TTL value specified. Here I am reducing the value of TTL to 300 seconds from 86400 seconds. This means newly cached DNS records will expire in 5 minutes ( You can reduce it further if you wish).
However since the previous TTL value has a life span of 1 day, an immediate change in the A record may take hours to get fetched to the ISP cache. So we need to wait for one day so that all DNS cache servers hold the DNS records with just 5 minutes of TTL value. Once such a state is reached, each ISP will check the actual records at a regular interval of 5 minutes which ensures that any change in the authoritative name server will be reflected in the entire internet within 300 seconds.
Now transfer the domain. Once the DNS propagation is complete, change the TTL value back to 86400 seconds. Otherwise, high traffic for the DNS records from the entire cache servers will increase the bandwidth and load on the name server unnecessarily.
Here I am trying to explain the steps to be followed in common hosting platforms.
Here I’m explaining the steps to be followed in cPanel servers to reduce the DNS propagation time.
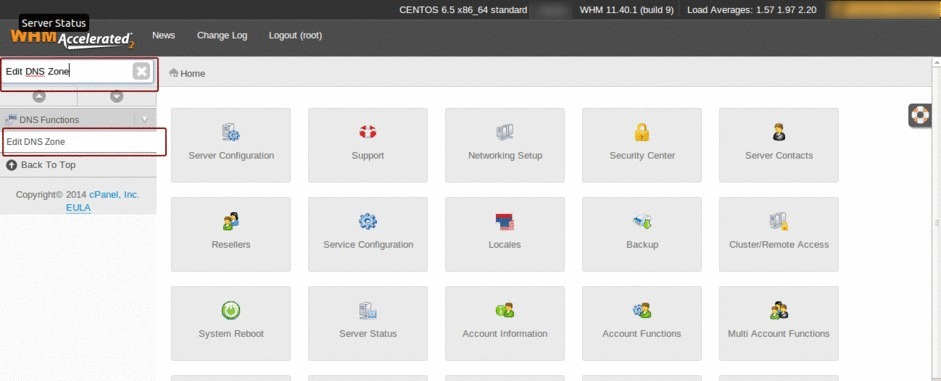
Step 1: Login to WHM. In the search box of the Home page, type Edit DNS Zone. Click Edit DNS Zone which is shown under DNS Functions.
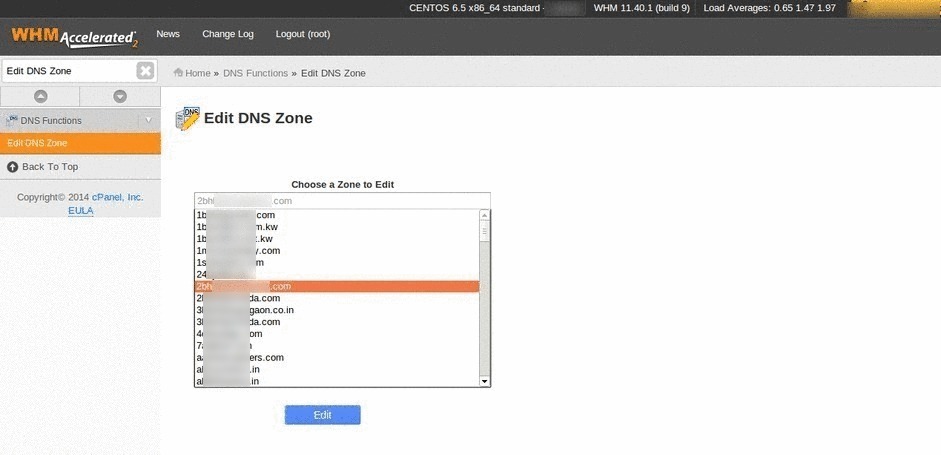
Step 2: Select the domain and click Edit button. For the purpose of anonymity, I have blurred the domain names in the images.
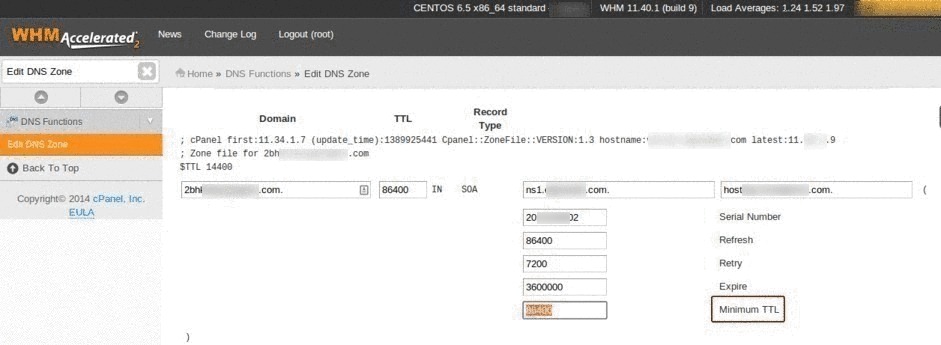
Step 3: Edit Minimum TTL.
Step 4: After editing click Save.

Here I’m explaining the steps to be followed in parallels Plesk panel 9.5 to reduce the DNS propagation time.
Step 1: Login to Plesk panel.

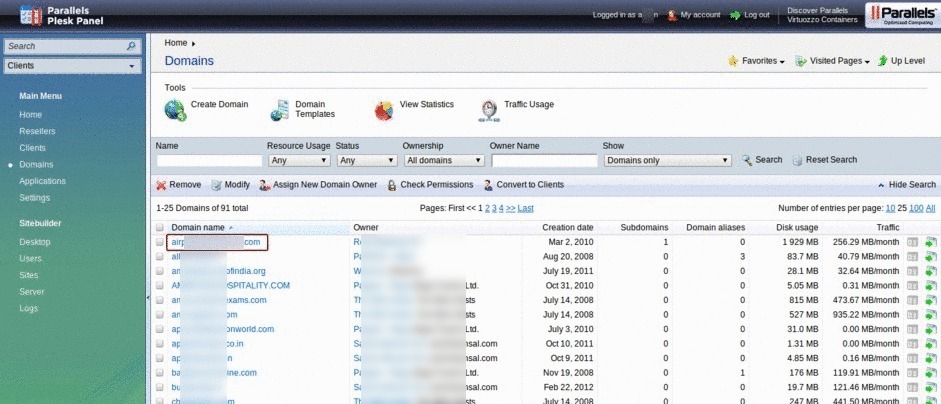
Step 2: Select Domains under Main Menu.

Step 3: Click on the domain.
Step 4: Click DNS Settings under Website.

Step 5: Click SOA Record.
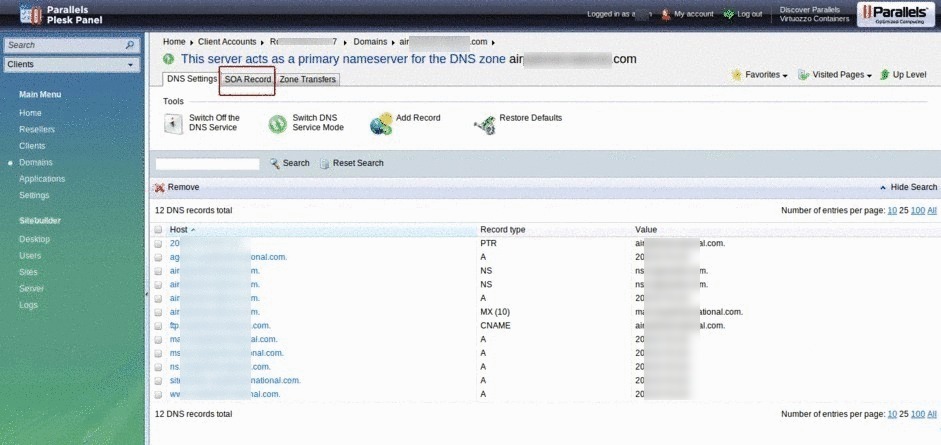
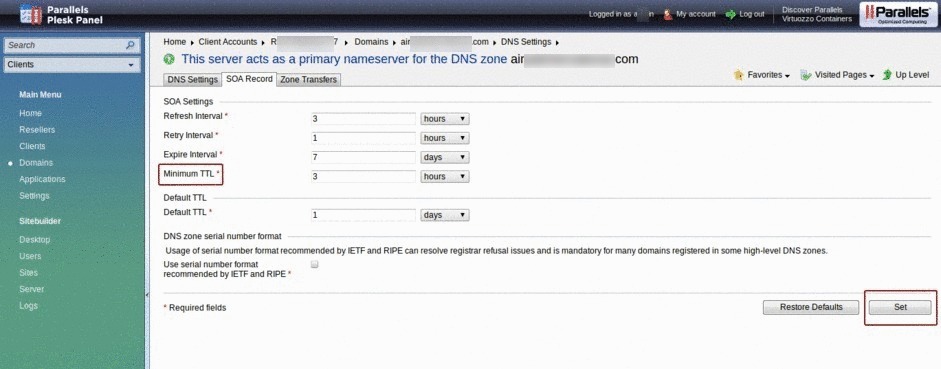
Step 6: Edit Minimum TTL and click Set.
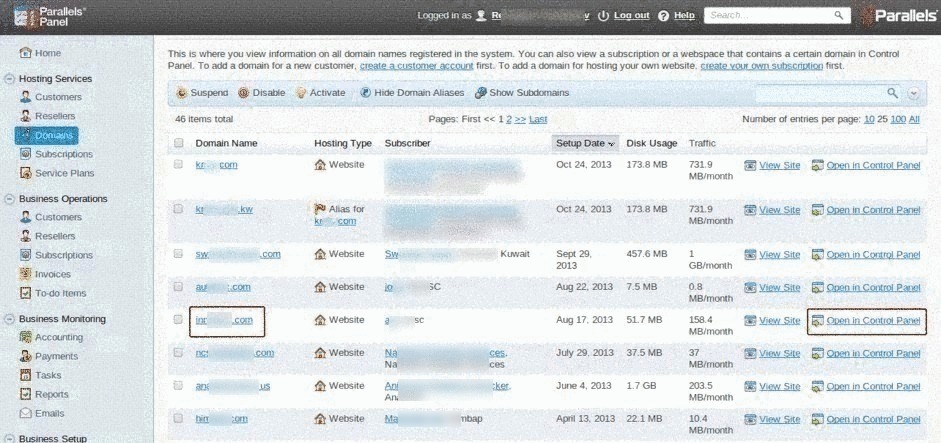
Here I’m explaining the steps to be followed in parallels Plesk panel 11.5.30 to reduce the DNS propagation time.
Step 1: Login to Plesk Panel.
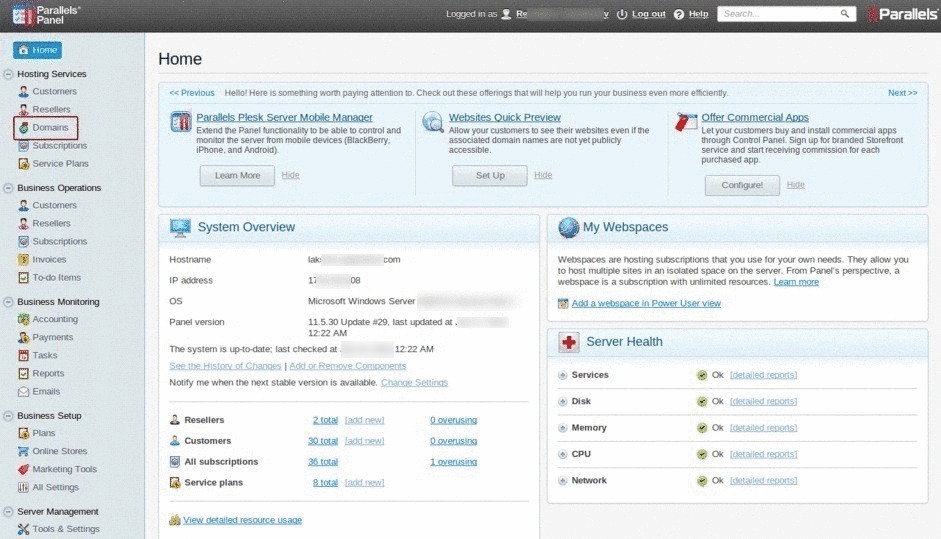
Step 2: Select Domains under Hosting Services.
Step 3: Click on Open in Control Panel of the domain.
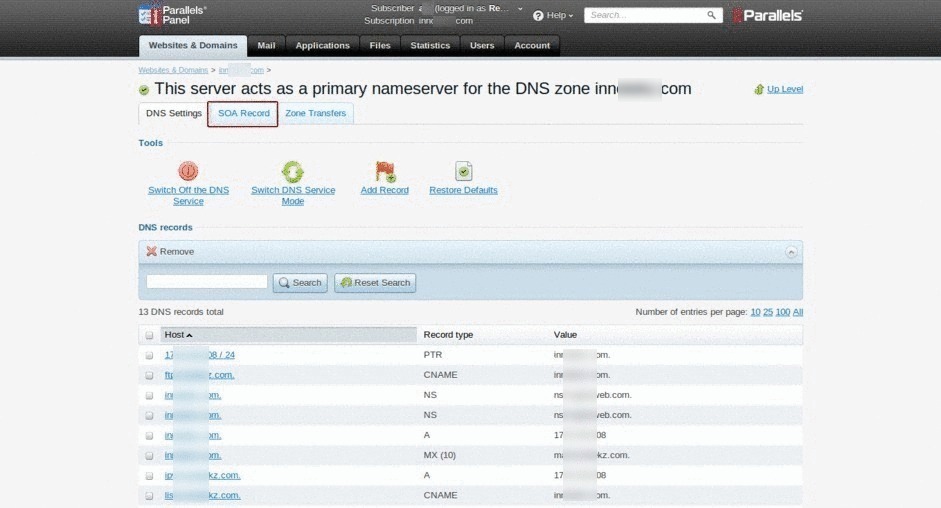
Step 4: Click on the Domain.

Step 5: Click DNS Settings.

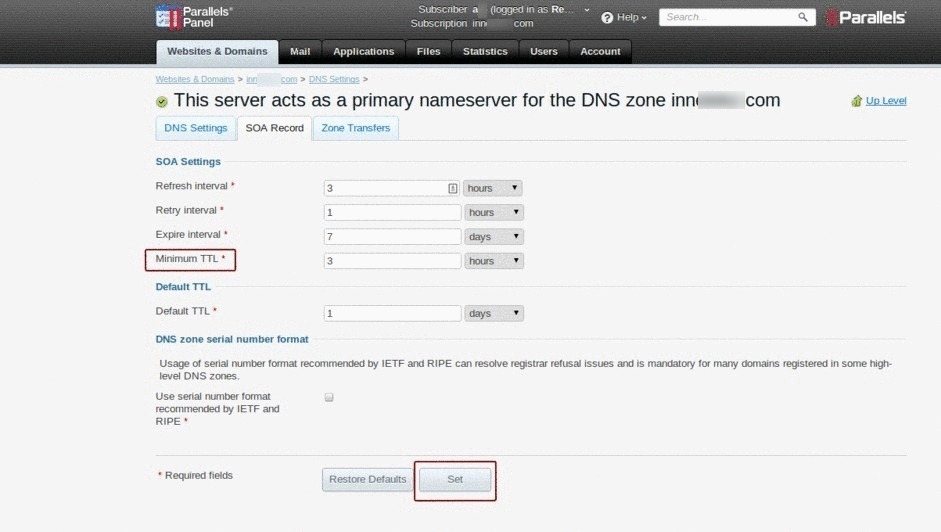
Step 6: Select SOA Record.
Step 7: Edit Minimum TTL and click Set to save the changes.
Thus we can successfully reduce the TTL value. Now migrate the account to the new IP or change the A records after one day/ the previous TTL value.
![]()
Category : Linux

Jinta is fond of learning things, even-though seemingly difficult and would like to show her best in whatever doing, with dedication and discipline. She is sinked in the field of Linux System Administration since 2016. Enthusiastic to learn more on the advanced world of Linux. Started to write blogs since 2016 to convey the ideas to public. Apart from that, she is passionate on travelling.


Add new commentSIGN IN