Published on: May 25, 2017 by Liya Gigi

Scenario:
The ImageMagick installation steps are simple for a cPanel server. ImageMagick is an addon for your cPanel server which allows image manipulation. ImageMagick is a software suite to create, edit, compose, or convert bitmap images. If you are more curious about it then you can check the details on here
ImageMagick Installation via command line
For command line installation, you simply need to execute the cPanel script for the same
/scripts/installimagemagick
This will take a couple of minutes to complete. After installation you can check the version by executing the following command:
/usr/bin/convert --version
The output will be something similar to the one given below
root@server [~]# /usr/bin/convert - - version
Version: ImageMagick 6.7.2-7 2015-07-29 Q16 http://www.imagemagick.org
Copyright: Copyright (C) 1999-2011 ImageMagick Studio LLC
Features: OpenMP
root@server [~]#
In cPanel & WHM version 11.34 or earlier you can run the /scripts/installimagemagick script as the root user to install ImageMagick. But from cPanel/WHM version 11.36 or above, the “installimagemagick” script from the cPanel & WHM system has been removed. This package installs ImageMagick to the /usr/local/cpanel/3rdparty directory.
Now cPanel runs version 64, so the above method can not be followed now.
In this case, you can install ImageMagick via YUM repository. The basic packages required can be installed running with the following command:
yum -y install ImageMagick-devel ImageMagick-c++-devel
How to verify whether we have installed ImageMagick or not?
You can check the existence of “convert” or “mogrify” binary to confirm whether the ImageMagick is installed or not.
Uninstall ImageMagick
It’s simple, do execute the following command to remove ImageMagick from your server.
/scripts/cleanimagemagick
Imagick is a native PHP extension to create and modify images using the ImageMagick API. This extension requires ImageMagick version 6.5.3-10+ and PHP 5.4.0+.
Installation steps for Imagick via WHM control panel
Step 1 : Login to WHM control panel.
Step 2 : Do follow these steps:
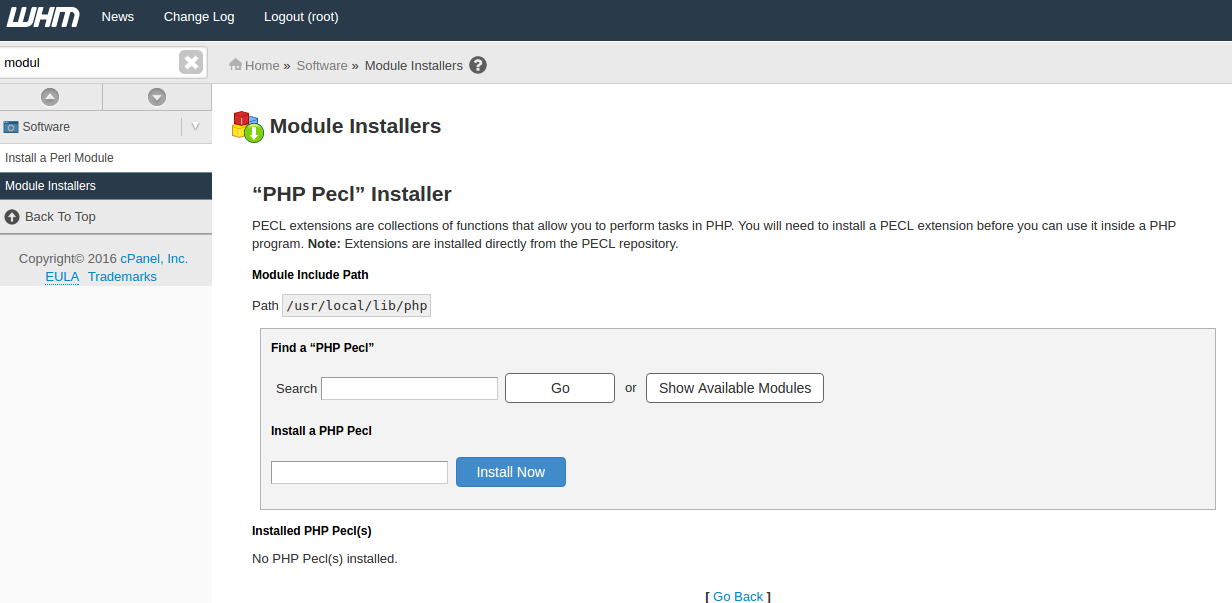
Go to WHM -> Software -> Module Installers -> PHP Pecl (manage).
On the box below “Install a PHP Pecl” enter “imagick” and click “Install Now” button.
Step 3 : Restart Apache.

Uninstallation steps for Imagick via WHM control panel:
Step 1 : Login to WHM control panel.
Step 2 : Do follow these steps:
Imagick: WHM -> Software -> Module Installers -> PHP Pecl (manage).
Click on Uninstall button for Imagick
Step 3 : Restart Apache.
In cPanel & WHM version 11.36, if you require PHP bindings with Apache, these bindings can be installed via the PECL utility:
/usr/local/bin/pecl install imagick
Installation of ImageMagick on CloudLinux installed server
In a CloudLinux installed server there is an additional step to enable packages to users on that server. Installing packages on the server won’t reflect in these cases. It won’t be available inside CageFS. You will want to install ImageMagick inside CageFS as follows to make those binaries available inside CageFS:
To see the list of RPMs currently installed under CageFS:
cagefsctl --list-rpm
To add a new RPM:
cagefsctl --addrpm ImageMagick
To pick up the changes:
cagefsctl --force-update
Enabling Imagick PHP Extension on CloudLinux server
You can enable imagick PHP Extension through cPanel >> Select PHP Version
That’s it.
Category : General, Howtos, Linux

Add new commentSIGN IN