Published on: May 10, 2012 by Scott S

Scenario:
Before we start lets see what R1soft is. R1Soft is an affordable, easy-to-use, high-performance backup management tool which helps in backup, restore, and disaster recovery. Its a software application which is used to backup the data in a client(R1Soft agent) which is assigned to R1Soft server based upon the configurations which we define. R1soft can also be used to restore files and databases which I’ll be explaining later.
For a client to communicate with R1soft server an R1soft agent cdp-agent must be installed on the client. Once the cdp-agent is installed, we can add it to the R1soft server for backup management.
Let us assume that R1soft Server Enterprise Edition is already configured and running on IP xxx.xxx.xxx.xxx. I’ll explain on how to install cdp-agent on a new client (agent) so that it can be added to the R1soft Server.
The steps I follow here will help you to install cdp-agent on a redhat, fedora or Centos platform. However the installation steps on a Debian version are also similar with slight changes. You can get more details on installing cdp-agent on a Debian platform by following http://wiki.r1soft.com/display/CDP3/Installing+Agent+on+Debian+and+Ubuntu . Once the cdp-agent is installed in the client, we’ll see the steps to add it to the R1soft Server.
So lets start 🙂
INSTALLING CDP-AGENT on a client
——————————————————-
There are two methods by which you can install a cdp-agent to a linux server:
1. Automatic:
Here we add the R1Soft packages repository to the yum configuration first and then install the Agent using yum.
2 . Manual:
Here we download the R1Soft binary packages first and then intstall them using rpm.
Wondering what these are actually? Dont worry, We will see the installation using both yum and rmp below:
->Installing Agent Using YUM (Automatic method):
———————————————————————-—–
YUM is the easiest way to keep programs up-to-date on RedHat-compatible distributions. YUM downloads and installs the latest version of a program.
Configure YUM Repository
—————————————-
First, create a .repo file for yum with the R1Soft repository information:
#cd /etc/yum.repos.d
Open a new file named r1soft.repos using vi or ant text editors like nano, vim etc: I’m using vi text editor in this tutorial.
#vi r1soft.repo
Then insert the following text into the file and save the file:
————————————————————–
[r1soft]
name=R1Soft Repository Server
baseurl=http://repo.r1soft.com/yum/stable/$basearch/
enabled=1
gpgcheck=0
—————————————————————-
To verify what is written to the r1soft.repos file, use the following command:
#cat r1soft.repo
This command should print the contents which we added in the r1soft.repo file.
Once the yum repository is configured we can use the yum command to install the cdp-agent.
Installing The Package For CDP-AGENT
———————————————————–
Once you have configured the YUM repository, you can use the following command to install CDP Agent for Enterprise Edition:
# yum install r1soft-cdp-enterprise-agent
Enter “y” to initiate install process.
->Installing Agent Manually (Using RPM)
———————————————————–
In the automatic installation using YUM, the agent was automatically downloaded and installed. But here we need to manually download the agent and then install it using rpm command. I’m explaining the steps below:
Download CDP Agent first:
—————————————–
This is an important step because we have to carefully choose the agent meeting our OS architecture.
First find out whether the client has a 32bit or 64 bit OS by typing the command:
#getconf LONG_BIT
You will get the exact OS bit as the output 🙂
Once the OS bit is known choose the file accordingly.
Please follow http://wiki.r1soft.com/display/CDP3/Obtaining+Linux+CDP+Enterprise+Agent for obtaining Linux CDP Enterprise Agent.
In normal cases the files will be named as mentioned below for different OS types:
For a 32-bit system:
File name – R1Soft-EnterpriseAgent-linux32-3.18.2.zip
File size – 37.3 MB
For a 64-bit system:
File name – R1Soft-EnterpriseAgent-linux64-3.18.2.zip
File size – 41.04 MB
Before you download the file create a new directory named cdp-agent and then download the file into that directory. You can create the directory using the mkdir command:
#mkdir cdp-agent
#cd cdp-agent
Now download the files into this directory.
As you can see the downloaded files have a .zip extension which requires unzip tool for extraction.
Most Linux distributions come with the unzip utility pre-installed. To determine if you have the unzip utility, run:
# which unzip
This should return an output showing the path to unzip binary, something similar to the following:
/usr/bin/unzip
If it returns the following output, you need to install the unzip utility first:
unzip: Command not found.
To install unzip on RHE, CentOS, and Fedora:
# yum install unzip
Now that we have the unzip utility ready for its work. We need to extract the downloaded file using unzip command as follows:
# unzip r1soft-enterprise-agent-linux64-3.18.2.zip
Once all the packages are extracted its time for the installation to start.
Installing the Package:
————————-———
You must be a Linux root user to install CDP Agent. 😉
The files you have extracted now contains two folders: one with .deb packages (for Debian Platform-deb-linux64) and one with .rpm packages (“for RedHat platform-rpm-linux64). Since we use RedHatplatform select the .rpm package.
Each folder contains a set of CDP components:
r1soft-setup
r1soft-cdp-enterprise-agent
r1soft-cdp-agent
r1soft-cdp-async-agent-2-6
You will need to install all of them in one step. Use the cd command to go to the folder with the packages (in our case, rpm-linux64) and run the following command:
#rpm -i *.rpm
 Now that we have our cdp-agen installed.
Once this is done we have to install the kernel sources:
By default the RPM package installation will attempt to download a kernel module matching your running kernel. The RPM Package installation may be able to automatically load the binary kernel module.
If you see the following output, you can safely skip this step. The RPM packages were able to directly download a binary-compatible kernel module:
——————————————————————
Attempting to get a kernel module from ‘krnlbld.r1soft.com’
Module downloaded successfully.
/etc/init.d/cdp-agent start: cdp started
You will need to assign a username and password to the R1Soft CDP Server.
You can do this with ‘/usr/bin/r1soft-setup’ utility.
Use ‘/usr/bin/r1soft-setup –help’ for more information.
——————————————————————-
If you see the following output, you need to install the CDP kernel module manually:
———————————————————————–
Attempting to get a kernel module from ‘krnlbld.r1soft.com’
You will need to assign a username and password to the R1Soft CDP Server.
You can do this with ‘/usr/bin/r1soft-setup’ utility.
Use ‘/usr/bin/r1soft-setup –help’ for more information.
———————————————————————–
First we have to see the current version of kernel. To see the version of the running kernel, execute the following command:
#uname -r
Compare the version string you see with the name of the directory containing kernel sources under /usr/src/kernel. To do this, cd into /usr/src/kernels:
# cd /usr/src/kernels
# ls -al
Here, if you are not able to find the directory for the kernel version specified in uname -r output, run the following command:
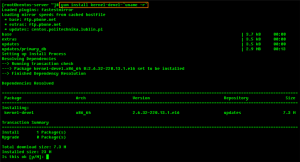
#yum install kernel-devel-`uname -r`

This command makes sure that the kernel devel version matches your current version. Proceed with the installation. Once the kernel-devel is completed you will get the directory for the current kernel in /usr/src/kernels
Now that we have to build the CDP Kernel Module:
——————————————————————————
# r1soft-setup –no-binary –kernel-dir /usr/src/kernels/YOUR_KERNEL_TREE
After running this command, you will see:
LAST STEP :
—————–
Restart the cdp-agen by entering the following command:
#/etc/init.d/cdp-agent restart
Thats it you have done it!! You have cdp-agent instlled on the client.
Now we will look into how to authenticate the new client to the R1soft agent for backup management:
Authenticating The Agent:
————————————
For security reasons, CDP Agent accepts connections only from known CDP Servers. To authorize a CDP Server to CDP Agent, you must add the CDP Server’s public key to Agent’s configuration.
1. Run the following command on the Agent machine:
#r1soft-setup –get-key [Server_URL]
in our case the server URL is http://xxx.xxx.xxx.xxx because I mentioned at the begining that R1soft server is installed on xxx.xxx.xxx.xxx 🙂
You can view the installed keys using the following command:
#r1soft-setup –list-key
Once this is done allow the R1soft server IP in our firewall using :
#csf -a xxx.xxx.xxx.xxx (for running this command CSF should be installed. you can get tutorials on installing CSF firewall from search engines. Here’s one URL http://www.webhostgear.com/432.html)
That’s it you have done everything that needs to be done for backup management on the Agent end. Now login to the GUI of R1soft Server Enterprise Edition to add the new agent to the server.
For any backup management assistances, do contact our backup management team Click here
Category : cPanel, Linux

Add new commentSIGN IN