Published on: August 17, 2015 by Vishnu K Raj
Scenario:
There are situations where Windows mirror drive failed that is the drives fail in Windows servers with software RAID 1. Below is a situation which occurs usually were one of the 2 drives of the mirrored set fails or both fails.
IN DETAIL
Explanation of some terms used in this article.
Mirrored drives (Mirror, Software RAID 1, Mirrored Arrays)
Software RAID 1 can also be referred to as a mirrored array of hard drives. Mirroring is implemented when fault tolerance or a useful backup is desired. Fault tolerance is the ability of the data contained in the mirrored set to remain intact if one of the drives fails. In a mirrored array, all of the data is duplicated across 2 or more hard drives. The general idea is all of one’s important data would be stored on a mirrored drive, and if one of the hard drives dies the data is still accessible or usable from the other drive.
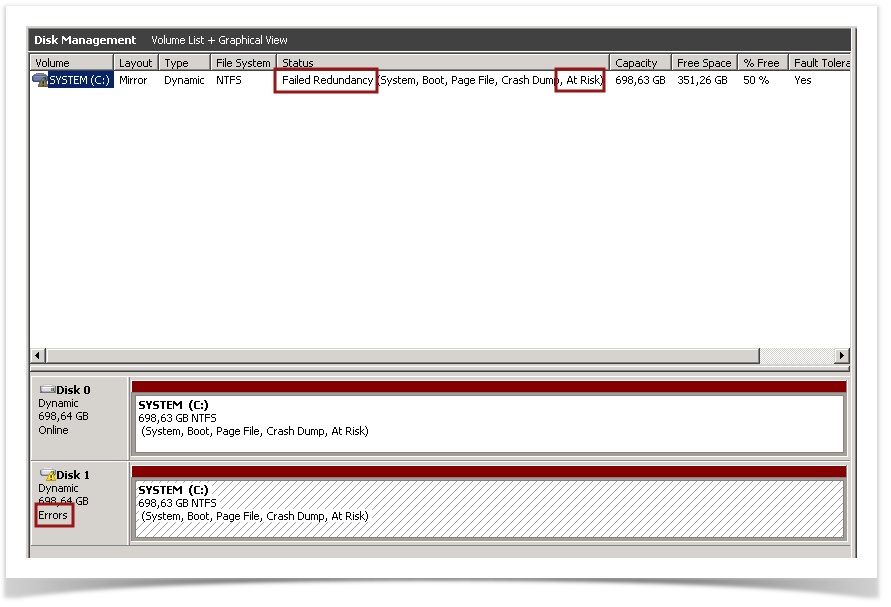
Failed Redundancy
During a state of “failed redundancy”, the volume is now only one hard disk when one of the mirrored set has failed or has errors, and it would be smart to replace the failed disk promptly to rebuild the array.
Secondary Plex
The disk containing the secondary boot option in a mirrored array can be called as a Secondary Plex.
SETTING UP A MIRRORED ARRAY/SET.
1. Goto Disk Management. (Ensure that the drives are briefed as unallocated, if not delete the partition if it is for a fresh installation.)
2. Right-click the unallocated space on one of the dynamic disks on which you want to create the mirrored volume, and then click New Volume.
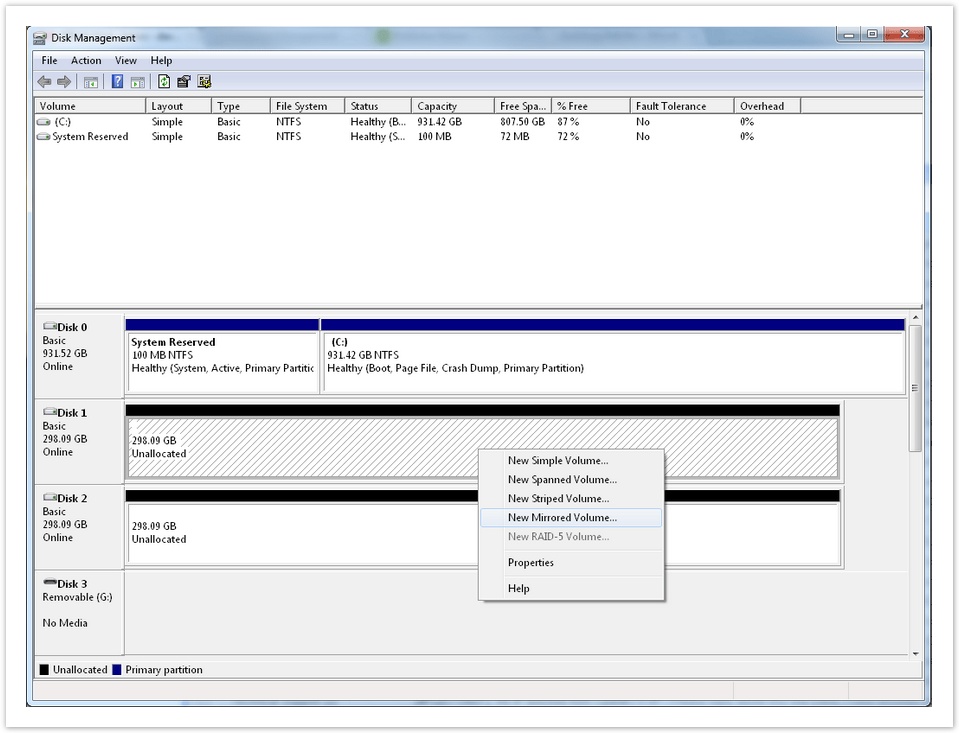
3. In the New Volume Wizard, click Next, click Mirrored, and then follow the instructions on your screen.
4. A series of prompts will ask you about some details of your new mirrored volume (array), like which disks are to be included, size of the volume, drive letter assignment, and volume name.
CHECKING A DRIVE FOR ERRORS.
You can use CHKDSK to have a brief check on the partitions. The usage of CHDSK is as below.
1. Goto CMD (Command Prompt) and type.
2. The usage is as below.
chkdsk [<Volume>[[<Path>]<FileName>]] [/f] [/v] [/r] [/x] [/i] [/c] [/l[:<Size>]] [/b]
There can be different situations were some disk errors will be fixed by this check and some non fixable errors will be skipped. There are various error exit codes as below which gives you the actual status of the partitions.
| Exit Code | Description |
| 0 | No errors were found. |
| 1 | Errors were found and fixed. |
| 2 | Performed disk cleanup (such as garbage collection) or did not perform cleanup because /f was not specified. |
| 3 | Could not check the disk, errors could not be fixed, or errors were not fixed because /f was not specified. |
But the most effective way would be to contact the Data Centre for a drive check. It would take almost 15 minutes(approx) for a drive check with the same amount of downtime.
If the report says that there is a condition of drive errors and a drive replacement is inevitable (which is what is described here) please follow the below options.
There can be two situations.
1. When one drive has failed and needs replacement.
When only one of the 2 disks has to be replaced we can easily break the mirror and replace the failing disk and then Reactivate the Mirror.
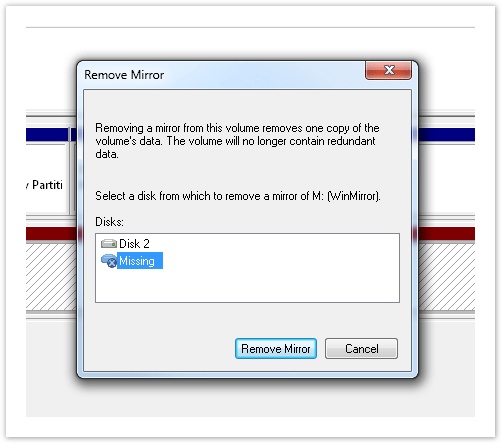
a. Right-click on the dynamic disk that is still functioning and go to “Remove Mirror…“
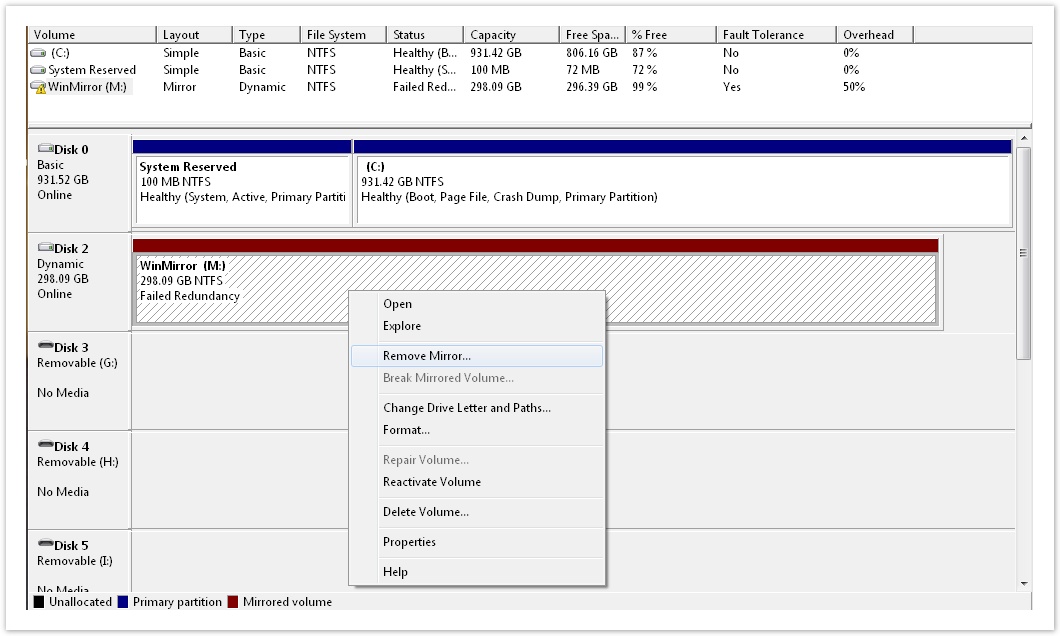
b. Select and remove the failed disk. In my example, Disk 1 was the disk that failed, so I’m keeping Disk 2 and removing Disk 1 (which is labeled just as “Missing”).
Now you need to change the drive which is faulty. Now in case of most DC’s they ask for the serial number of the disk to be replaced.
You can type the below command in the CMD to get the serial number of the drives.
wmic diskdrive get serialnumber
You get an output as below.

c. When the drive has been replaced you can jump to the above section ‘SETTING UP A MIRRORED ARRAY/SET‘ is expalined and follow the steps as brief do the below
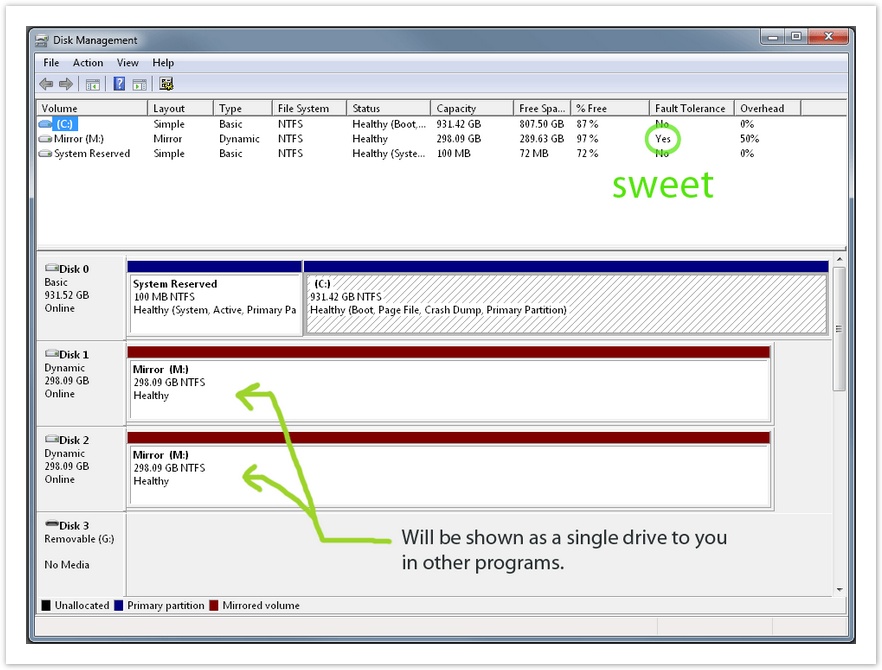
d. Right-click on the disk that survived (the one from the original mirror), and go to “Add Mirror…“
Now you have a new RAID 1, Mirrored Volume. You’ll notice that both drives in the array say “Resynching“, which is pretty much the one drive being copied to the other.
2. When both the drives has failed and needs replacement.
This is quite a tricky process which may turn out be an infliction if not executed correctly.
There may arise situations were both the drive of a mirrored set has errors and needs to be replaced. Usually these servers can be identified when in the process of booting the server can only be booted from the Secondary Plex (This is just my inference from all the dual drive failures I have seen). Rebooting the server itself can be trouble as we need to get the DC Console to select the boot option when prompted for to use the Secondary Plex (which is not the default boot priority).
We can use a utility called ‘msconfig‘ to setup the boot options as below.
1. Goto ‘Run‘ and type ‘msconfig‘ and press Enter. Goto to the Boot Tab.

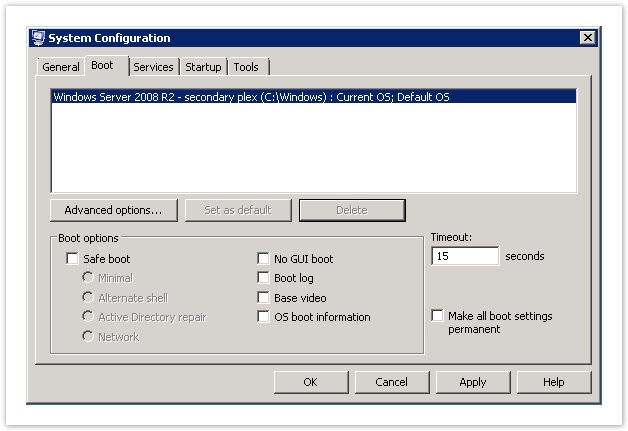
2. Use the second option for Secondary Plex as the default option.
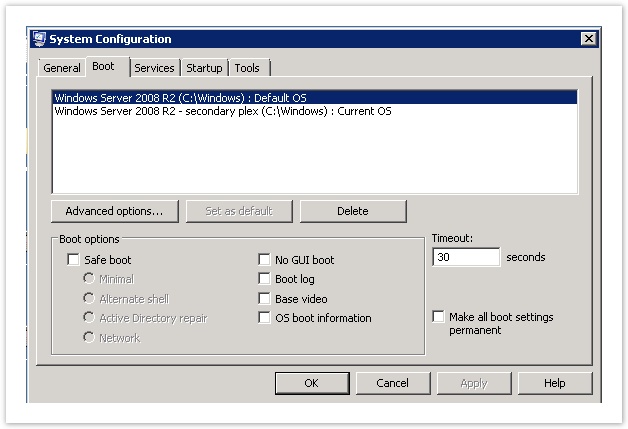
3. Remove the first option and make the changes permanent.
Now coming to the actual scenario of changing the drives.
Here is what I have followed in these situations.
But it doesn’t end so quickly in some cases. There are some cases were server don’t boot from the secondary plex when the first drive is replaced. This is because the boot manager was sitting in the partition on the first drive.
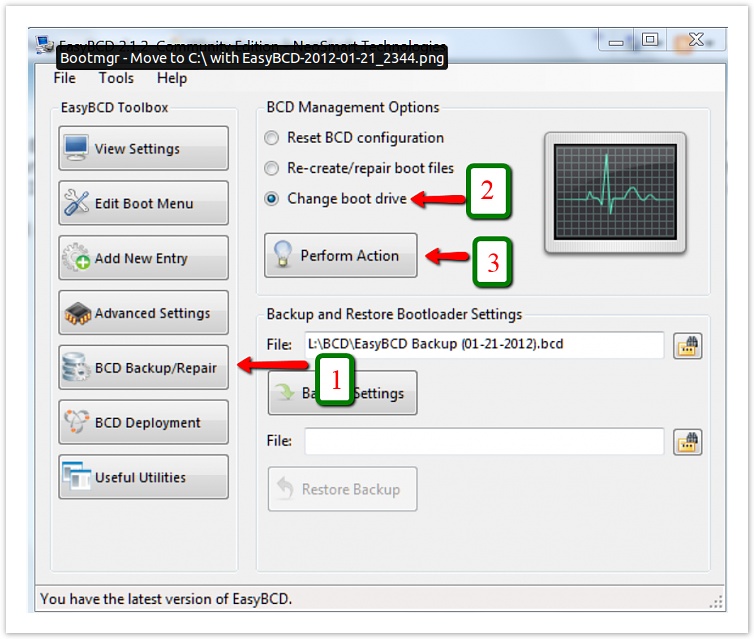
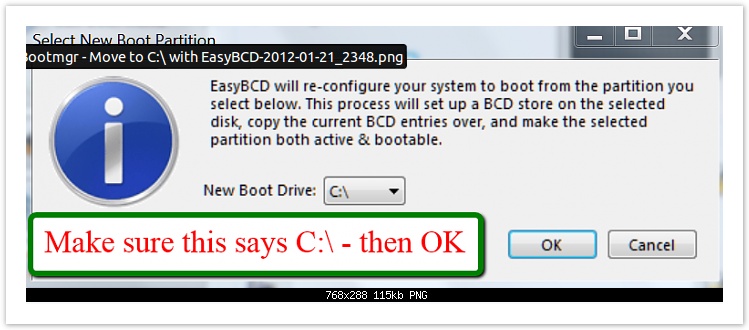
You can use the following to steps to move the boot from the 100MB partition in the first drive to the C:\ partition. The boot manager will not be moved from the original location – it will only be copied to the C:\ partition. The C:\ partition will be activated and the 100MB partition will be deactivated.
For this we use a software called EasyBCD. It can be download from http://cdn.neosmart.net/software/EasyBCD/community/EasyBCD%202.2.exe
The steps to take are very simple and explained in the 2 pictures. The first screen you get after starting EasyBCD and the second screen after step3 of the first screen. That is really all you need to know.
Now the steps mentioned above for ‘When both the drives has failed and needs replacement‘ can be followed.
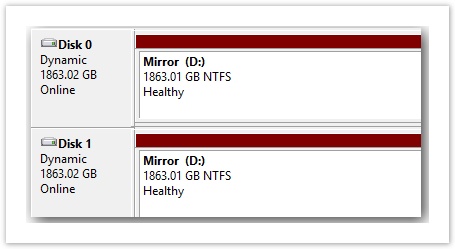
Final output will be two healthy mirrored drives.
Thank You for going through!!:)
![]()
Category : Howtos, Troubleshooting, Windows

Vishnu with his impressive knowledge in core concepts of various operating systems and applications, loves to feel and enjoy the excitement in performing highly sophisticated server operations. His excellent customer support skills and ability to groom new talents makes him one of the most successful mentor in the team. He is passionate about photography and travels a lot to satisfy the thirst of his Canon 600D.


Add new commentSIGN IN