Published on: January 16, 2017 by Anitta Jose
Scenario:
IIS stands for Internet Information Services. It was formerly known as Internet Information Server. Actually IIS is an extensible web server created by Microsoft for use with Windows NT family. It supports HTTP, HTTPS, FTP, FTPS, SMTP, etc. Let us see how the SSL certificate installation can be done in Microsoft IIS 7.
Follow the steps mentioned below to generate CSR through IIS:
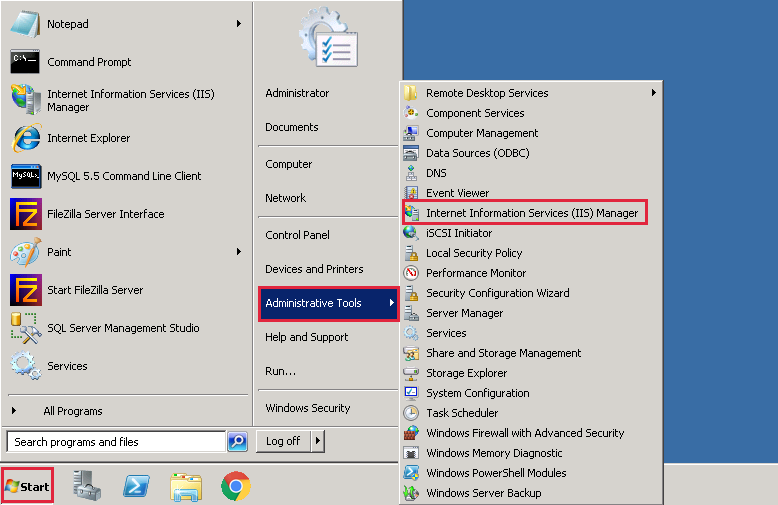
Step 1:
Click start , then Administrative Tools, then Internet Information Services (IIS) Manager.
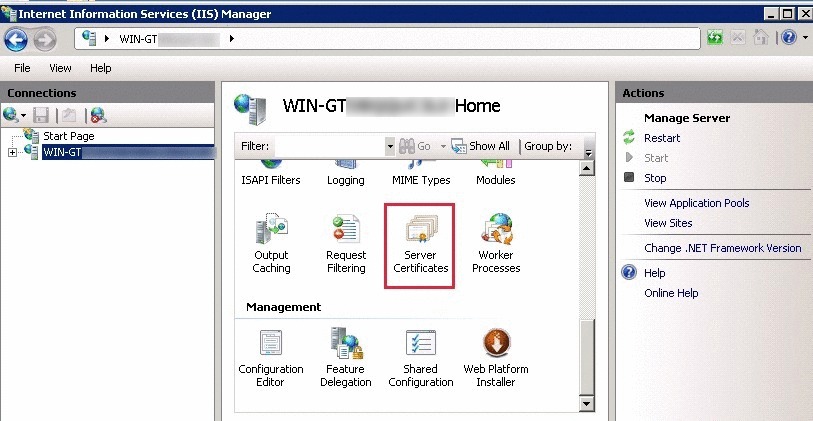
Step 2:
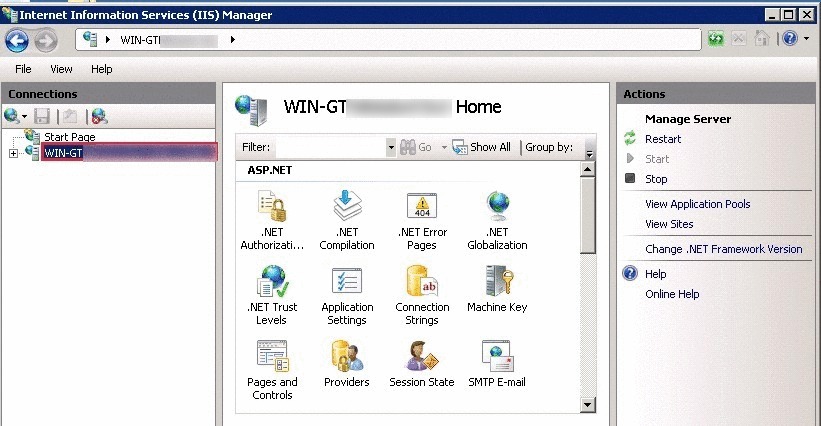
In Internet Information Services (IIS) Manager, Under Connections, select our server’s Hostname.
Step 3:
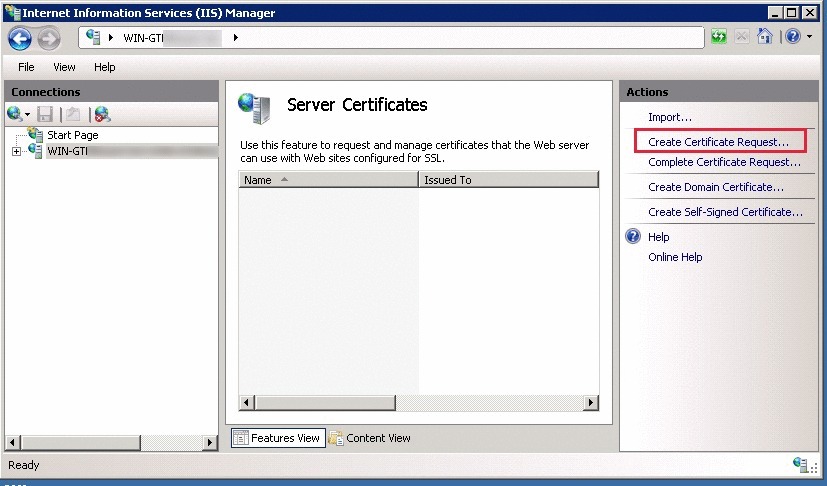
From the center menu, double-click the Server Certificates button in the Security section.

Step 4:
Next, from the Actions menu on the right, click on Create Certificate Request. It will open the Request Certificate Wizard.
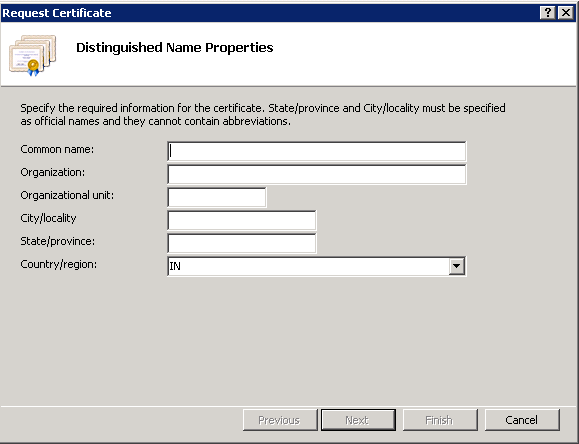
Step 5:
In the Distinguished Name Properties window, enter the following information:
(a) Common Name – Enter a fully qualified domain name.
(b) Organization – Legally registered name of the organization/company.
(c) Organizational Unit – Specify department name within organization. It is an optional field.
(d) City/Locality – City in which organization is located.
(e) State/Province – State in which organization is located.
(f) Country/Region – Select the country from the drop down box.
Step 6:
Click Next.
Step 7:
Now it shows Cryptographic Service Provider Properties window, enter the bit length and then click Next.
Step 8:
Enter a file name for CSR file and click Finish.
Now you’re ready with CSR, go ahead and purchase SSL certificate.
Follow the steps mentioned below to install SSL certificate on a particular domain:
Step 1:
Click start , then Administrative Tools, then Internet Information Services (IIS) Manager.
Step 2:
In Internet Information Services (IIS) Manager, Under Connections, select our server’s Hostname.

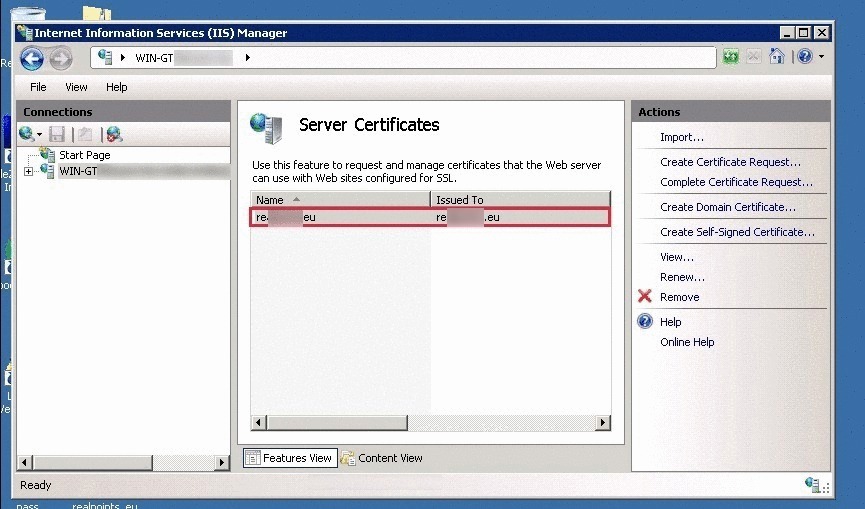
Step 3:
From the center menu, double-click the Server Certificates button in the Security section.
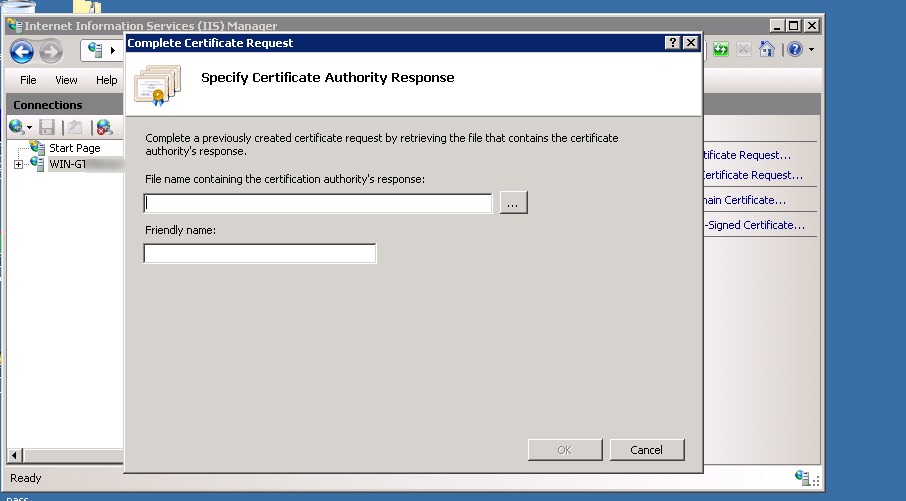
Step 4:
In the Actions menu, click Complete Certificate Request to open the Complete Request Certificate wizard.

Step 5:
In the Complete Certificate Request wizard, on the Specify Certificate Authority Response page, under File name containing the certification authority’s response, browse the required certificate file.
Now in the box to enter Friendly name, enter a name to identify the certificate.
[otw_shortcode_info_box border_type=”bordered” border_style=”bordered” background_color=”#10a5e0″]Friendly name is not part of the certificate, it is just used to identify the certificate file. [/otw_shortcode_info_box]
Step 6:
To install the SSL Certificate to the server, click OK. Now the installed certificate will be shown under Server Certificates.
Step 1:
In Internet Information Services (IIS) Manager, under Connections, expand our server’s name, expand Sites, and then, select the site that we want to secure with our SSL Certificate.
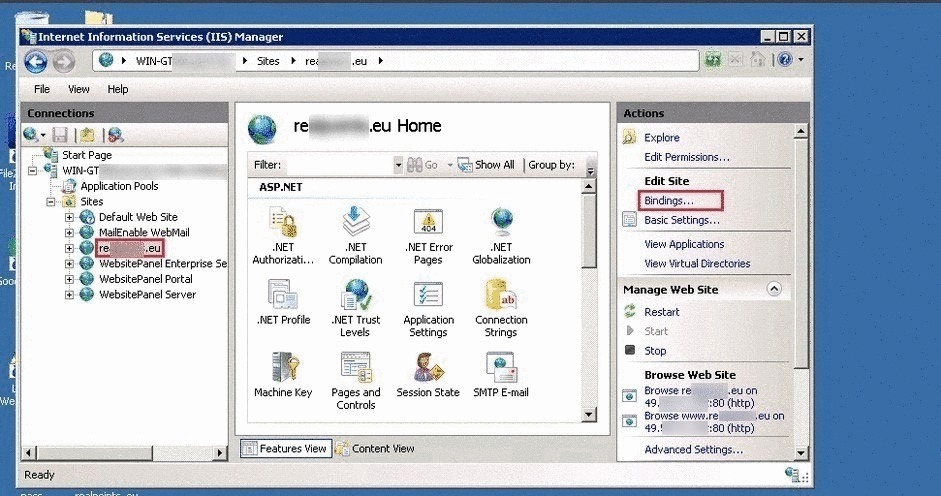
Step 2:
In the Actions menu, under Edit Site, click Bindings.
Step 3:
In the Site Binding window, click Add.
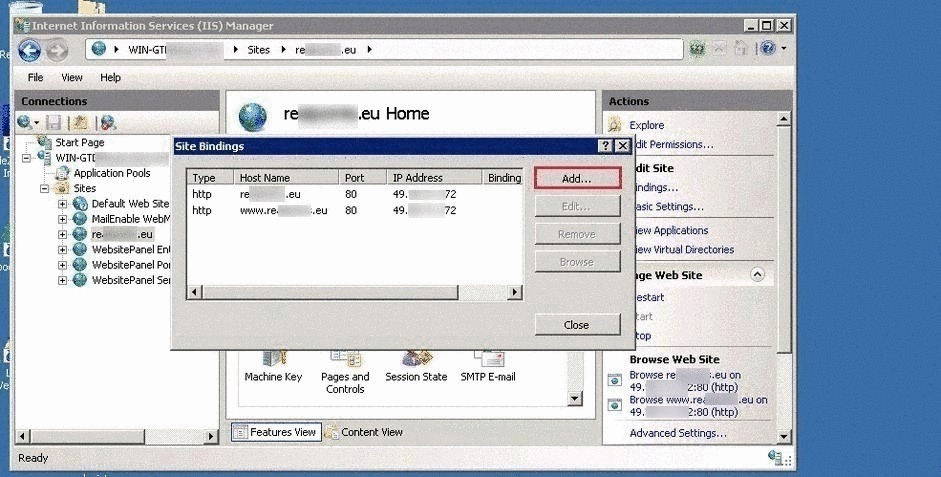
Step 4:
In the Add Site Bindings window, enter the following information and then, click OK:
(a) Type – In the drop-down list, select https.
(b) IP Address – Select the IP address to which the website points to.
(c) Port – Enter 443 unless it use some custom port for SSL.
(d) SSL certificate: From the drop-down list, select the friendly name of the SSL certificate we just installed.
Step 5:
The SSL certificate installation is now completed, and our website is configured to accept secure connections. 🙂
![]()
Category : General, IIS

Anitta is systems engineer since 2015 and holds broad experience in Linux, WordPress, and cPanel systems administration. Her interest lies more in Cloud technologies (AWS). From 2016, she writes blogs to share her experiences with wider audience.


Add new commentSIGN IN