Published on: February 13, 2016 by Felix
Scenario:
I will be demonstrating on how to update/upgrade WHMCS version to the latest one.
Following are the general steps to manually upgrade Full Release WHMCS, but it may vary from version to version. So you are recommended to read the upgrading steps given in their official documentation before upgrading ( http://docs.whmcs.com/Upgrading )
Legend
WHMCS Domain : http://whmcs.dsages.com/
WHMCS installation folder : /home/dsages/public_html/
WHMCS Admin directory : /home/dsages/public_html/billing/
Please note that the details used here are dummy values and you need to replace it with your actual values.
Requirements
SSH access to your WHMCS installation folder.
Backup
Take a backup of the website including its files and database before proceeding.
Step 1:
First of all take a backup of the current WHMCS installation folder.
In my example I will be using the domain http://whmcs.dsages.com/ and WHMCS is installed in ‘/home/dsages/public_html/ .
root@dsage[/home/dsages]# cp -vR public_html/ public_html.old
Step 2:
Create a backup of the WHMCS database.
Database details can be found in the file ‘ configuration.php ‘ under the WHMCS installation folder
root@dsages[/home/dsages/public_html.old]# cat configuration.php
<?php
$license = '--------';
$db_host = 'localhost';
$db_username = 'whmcs_wc';
$db_password = '---------';
$db_name = 'whmcs_wc';
$cc_encryption_hash = '-----------';
$templates_compiledir = 'templates_c/';
$customadminpath = 'billing';
?>
Due to security reasons some fields are intentionally left as blank. Your configuration file will have values in accordance with your installation
By default WHMCS Admin directory location would be “admin” . Due to security considerations, it is always recommended to change it to some custom locations. Here the Custom WHMCS Admin directory is located in /home/dsages/public_html/billing/ .
You can find the path from above snippet
$customadminpath= 'billing';
As mentioned in the configuration.php file, the db name is whmcs_wc .
Take a backup of your db. You can use PhpMyAdmin or mysqldump for the process
#mysqldump whmcs_wc > whmcs_wc_old.sql;
Step 3:
Begin the upgrade process by obtaining the latest full release download of WHMCS either from http://download.whmcs.com/ or from your license provider (if using a reseller) .
To download the file you must login to WHMCS as a client.
Step 4:
After downloading the file to your local machine, upload it to the server using FTP or SCP.
Step 5:
Extract the contents and copy it to the WHMCS installation folder. Before extracting make sure that there is no directory in the name whmcs/ under the destination folder.
root@dsages[/home/dsages]# ll -d whmcs/
ls: cannot access whmcs/: No such file or directory
root@dsages[/home/dsages]# unzip whmcs_v602_full.zip
root@dsages[/home/dsages]# /bin/cp -Rv whmcs/* ./public_html/
Note that public_html/ is the WHMCS installation folder in this example. If its another directory replace it with that folder name.
Using the command /bin/cp will forcefully copy without asking for confirmation, so be cautious.
Step 6:
Rename your old WHMCS Admin directory and replace it with the new one.
root@dsages[/home/dsages/public_html]# mv billing/ billing.old

root@dsages[/home/dsages/public_html]# mv admin/ billing/
If there is any .htaccess file present in the old WHMCS Admin directory, make sure to copy it to the new one.
Mostly it would be rules for browser level authentication.
AuthName "Admins Only"
AuthUserFile "/home/dsages/.htpasswds/billing/passwd"
AuthType Basic
require valid-user
Make sure the AuthUserFile location is accessible.
Run the following command to confirm that all files/folders are in the right ownership.
root@dsages [/home/dsages]# chown -R dsages.dsages public_html/*
The username of the account in this example is dsages
Step 7:
Now visit the installation file ‘ install/install.php ‘ under WHMCS installation folder and you will be automatically redirected to the upgrade process. In my example it is
http://whmcs.dsages.com/install/install.php
Step 8:
Agree to the WHMCS End User License Agreement and follow the steps on screen to upgrade your database.
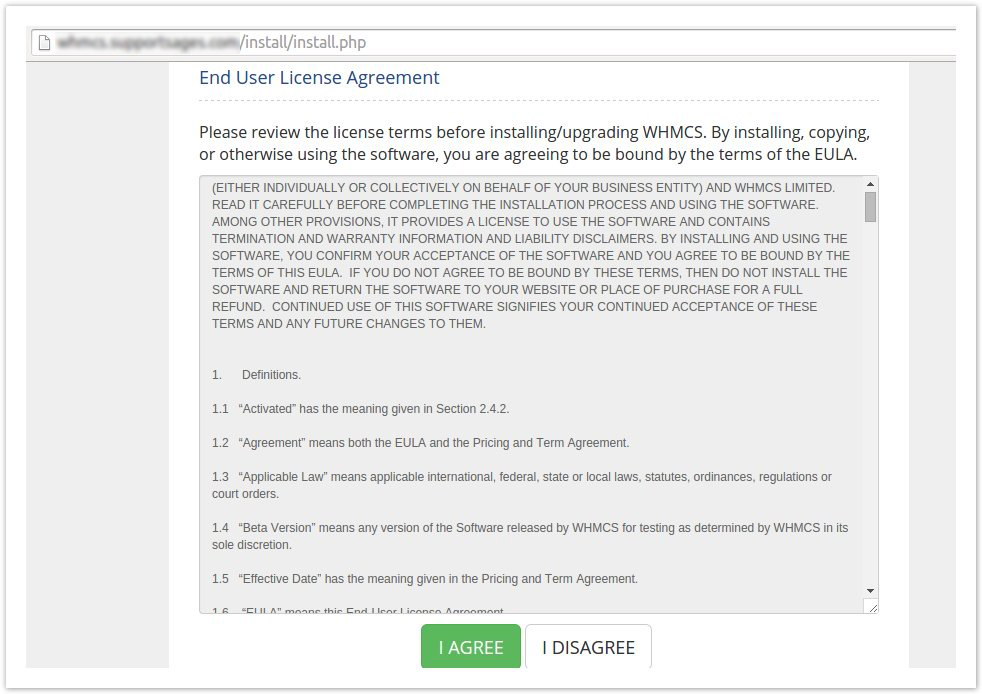
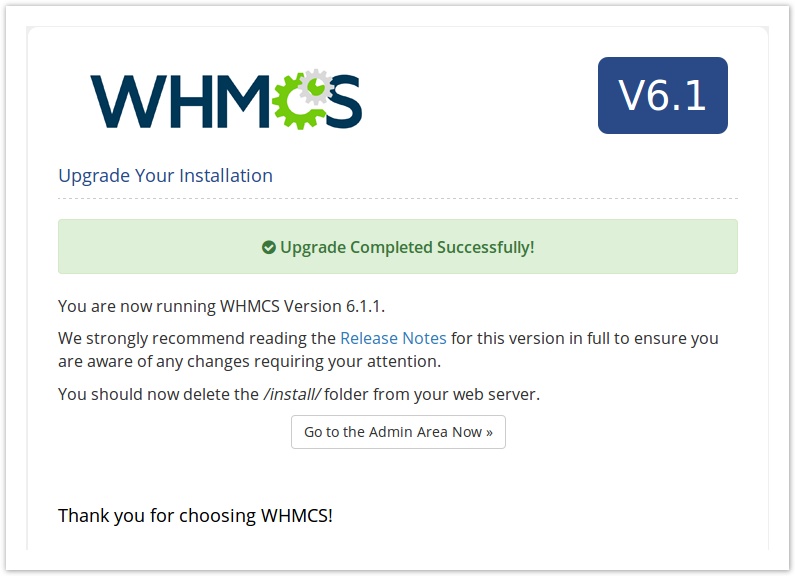
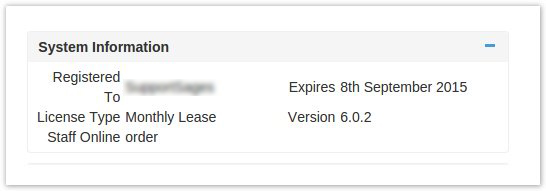
Note : Above screen-shots are taken from 6.1.1 upgrade
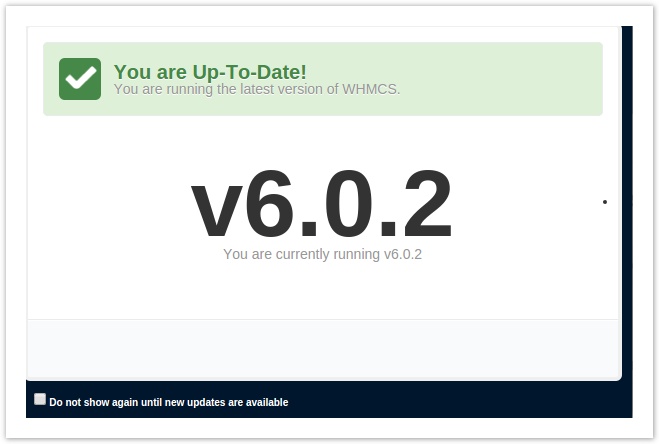
Sometimes you will see the below message :

In this case you can proceed to the next step.
Step 9:
Delete the install folder from your server. ie; /home/dsages/public_html/install/ else you will see the below warning message when accessing WHMCS Admin Page.

root@dsages[/home/dsages/public_html]# rm -vrf install/
Always use ‘rm -rf’ with caution.
Step 10 :
Access your WHMCS Admin URL http://whmcs.dsages.com/billing/ .
After logging in, you will see the below message :
Your upgrade is now complete 🙂
If you don’t see this message, then you might have missed some steps. Check from the beginning to ensure that all steps are performed correctly.
1) After the upgrade, there may be issues with Custom Templates and Logo missing in the Invoices generated. Make sure to test your Custom Templates and Logo in the invoices.
From Setup -> General Settings and on the first tab of the general settings select your new custom template name from the Template dropdown menu.

You should have admin privileges to perform these actions.
2) If you notice the formatting is mixed or unclear, it can indicate that the cache has not been updated. Try clearing your browser cache or a hard refresh (Ctrl + F5) and delete the contents of the template cache directory ( templates_c/ by default ) to fix this.
root@dsages[/home/dsages/public_html]
# rm -vrf templates_c/*
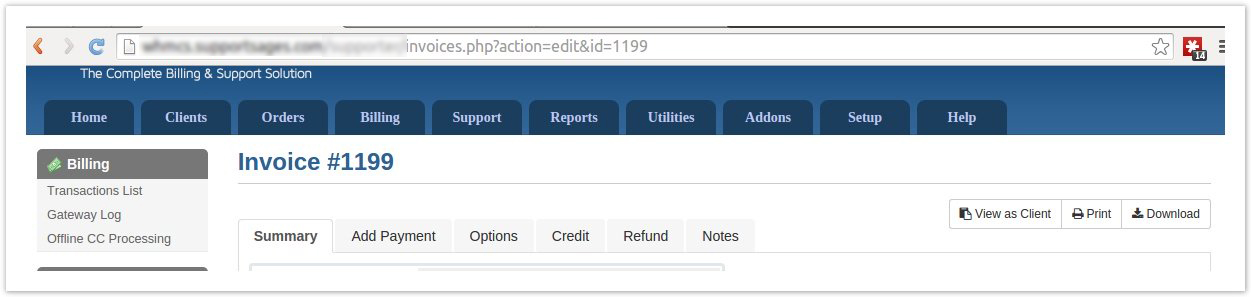
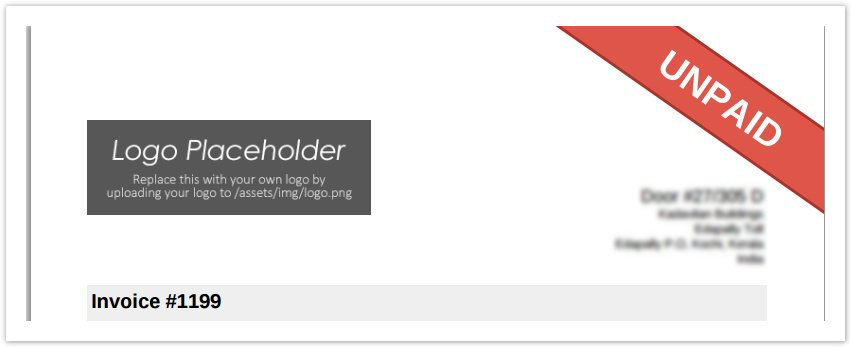
3) To check the logo, create a sample invoice under a test account or download an active invoice from any client and verify the PDF file.
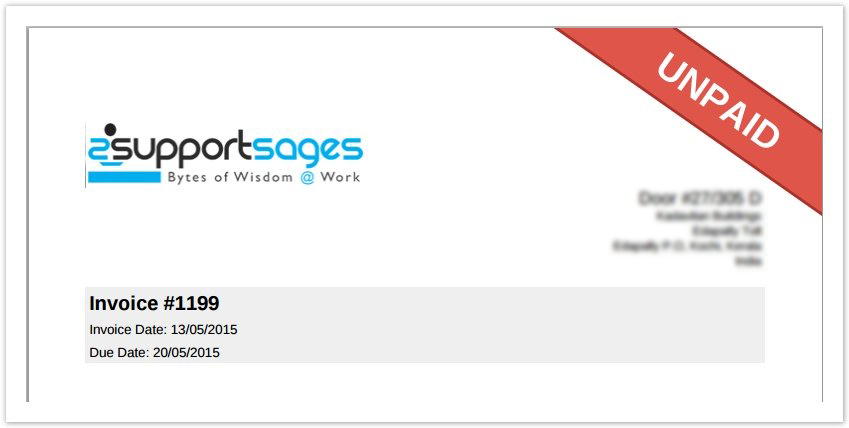
If the logo is missing then upload logo image file to the location mentioned in the PDF file.
In this installation the logo image file location is ‘ assets/img/logo.png ‘ under WHMCS installation folder ‘/home/dsages/public_html/ ‘
You might get a sample logo file from the URL in Setup-> General Settings-> General-> Logo URL
![]()
If the logo image file is blurred in the PDF then you will have to upload a new file having higher / lower resolution ( pixels ). The resolution of about 280*60 would be a perfect match.
![]()
Category : Howtos, Linux

Firaz has been in the Web Hosting industry since 2012. He is always fascinated in resolving complicated DNS, cPanel and other Web hosting issues. He loves to help newbies to climb the hill from a fresher to an experienced System admin. Movies and songs are his favourite passtime.


Add new commentSIGN IN